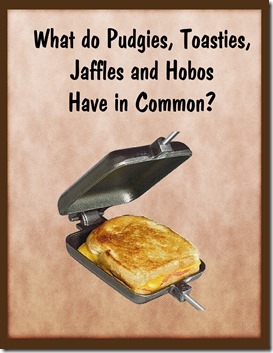
No, we’re not talking about the loved ones that will be attending your family reunion- we’re talking about Pie Irons! Pie Irons are known by many different names, Pudgie Pies, Pioneer Pies, Fire Pies, Toasties and Jaffles, but each name is referring to ingredient-filled "pockets" of bread toasted over a campfire. Cooking with pie irons is a long time tradition at our family reunions.
The Basics of Cooking With Pie Irons
Camp cooking doesn’t have to be just hot dogs and roasted marshmallows. Our family reunions wouldn’t be complete without a delicious raspberry pie cooked over the campfire and sprinkled with sugar and cinnamon. With a pie iron, you can cook anything from a simple grilled-cheese and ham sandwich to a delicious berry pie for dessert.
In its most basic function, a pie iron is a way to cook grilled cheese sandwiches and fruit pies over an open fire. This is done by placing the food inside the pie iron and then locking the two sides closed with a metal hook. Metal rods with wood handles extend from the castings so the user can easily maneuver the pie iron over a campfire. A few minute over the heat, usually 4 to 6 minutes, and you will have perfectly toasted sandwich or pie.
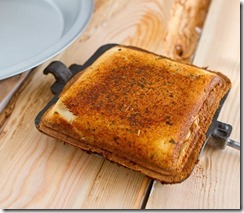
Pie Irons are available in both cast iron & aluminum. Our family prefers cast iron. They come in several different shapes; round, square, oblong and double. For our family reunions, we only use square irons. Aunt Lynn doesn’t think she’s had breakfast unless she has had a piece of toast so we’ve even used our pie irons for toast.

To make the most simple of pies, just take two slices of bread (buttered on the outsides), fill with jam, cheese, meat or pie filling- you don’t need much, then place inside the pie iron and lock it closed. Hold it over your campfire for a few minutes on each side and you’ll soon be eating a grilled cheese sandwich or a scrumptious apple pie.
At our family reunions, we like to make fruit pies in the evening while we are sitting around the campfire visiting, singing or playing games. About ten years ago, at a family reunion, cousin Mindy suggested that we sprinkle our freshly baked pies with sugar and cinnamon when we dump it out of the pie iron. Yummy! Some of our favorite flavors of fruit pies are lemon and raspberry.
Pie Iron Fruit Pies
Instructions
Step 1
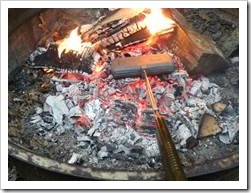
Build a campfire. Pie Iron pies do best over a hot bed of coals. Try to start your campfire an hour early to let it burn down.
Step 2
Butter one side of each slice of bread. Place one slice, butter side down, in one half of the pie iron.
Step 3
Put a spoonful of pie filling in the center of the bread slice. Keep the filling away from the edges, as it may leak while the pie is cooking.
Step 4
Place the second slice of bread, buttered side up, on top of the pie filling.
Step 5
Place the second half of the pie iron on the bottom half, squeezing the bread and filling together. Latch the two halves of the iron together, to keep it from opening up while the pie is cooking.
Step 6
Place the pie iron over the campfire, and let it cook for several minutes (4-6 minutes). Turn the pie over, and check for doneness. The pie is done when both sides are golden brown and toasted.
Step 7
Put the pie on a plate. If you have crispy edges you may want to carefully trim them. Be careful, as the filling is HOT! Sprinkle with sugar and cinnamon and enjoy!


