Halloween Ghost Cake With Flaming Eyes

Ghost Cake With Flaming Eyes

Posted on October 18, 2015

ghost cake

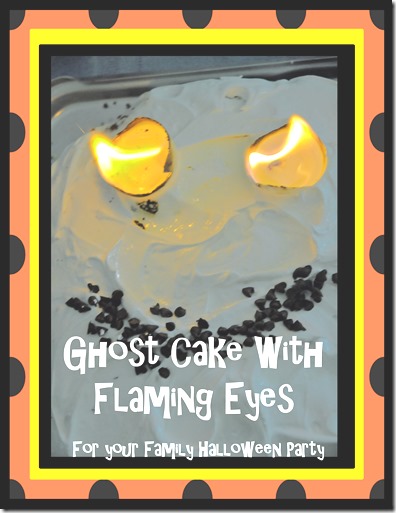
When I was a young mother I attended a workshop that included some fun holiday cooking ideas.  The most memorable idea I came away from the workshop with was this ghost cake with flaming eyes.

The best thing about this ghost cake is that you get maximum effect for minimum effort, so, if you are a busy mom or grandma, you can whip this cake up very quickly but the “wow” factor is huge!

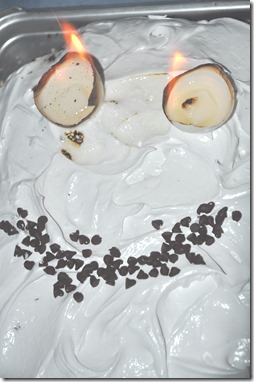
To make the eyes flaming you place a lemon extract-doused sugar cube inside of a clean eggshell for each eye and then you light the cubes on fire. When presenting the cake turn out the lights before bringing in the cake.

DSC_1237

Ghost Cake Recipe

Ingredients:

1 (18.25-ounce) box yellow cake mix, mix according to package directions
1 (7.2-ounce) package fluffy white frosting mix or make your own 7 minute frosting. (No Cook 7 Minute Frosting Recipe)
2 sugar cubes & 1 teaspoon lemon extract
Licorice string, chocolate chips, m & m’s- whatever you want to make a mouth

Directions:

Heat oven to 350 degrees F. Grease and flour a 9 x 13 x 2-inch baking pan.

Prepare the cake mix as directed on package. (When you break the eggs, crack each in the middle and pour out the egg. Then save the 2 best shell halves. Wash these halves and turn upside down to dry.) After mixing, pour the batter into the pan.

Bake for 35 to 40 minutes. When cooled, you can remove the cake from  the pan and put on a sturdy piece of cardboard or a tray so that you can trim your cake to look more ghost- like.  I just left my cake in the baking pan and felt like it looked ghost- like enough without the extra work to decorate it.

Frost the cake. Place the 2 egg shell halves round sides down on cake for eyes. Place 1 sugar cube in each shell half. Make a mouth of licorice string.

Just before serving, pour 1/2 teaspoon lemon extract over each sugar cube. Light the eyes and amaze family and friends!

Family Friendly Halloween Party Ideas

halloween unusual blog

Unusual Halloween Party Ideas

At familyreunionhelper.com we love reunions AND we love parties! Of course,  we specialize in wonderful family reunions but many of those reunion ideas translate perfectly into awesome parties.  Check out some of our favorite Halloween party ideas- nothing super scary but family friendly activities that will make your  guests SQUIRM!

Halloween Party Ideas to Make Your Guests “Squirm”

When I think of things that make me squirm I think of bats, worms, snakes and spiders- all typical Halloween creatures.  Oh, and what about eyeballs- sure to bring on a squirm!

image

It’s a Halloween Party!
Today’s the day we’re going to make you SQUIRM!

Date: ___________

Time: ___________

Place: ___________

Snakes, witches, and bats galore – Let’s see what this Halloween has in store.  Bring your family for a night of Squirms!

Halloween Decorations-

A few old brooms decorated with bows and lights makes for a fun entrance to your party.  Wrap plastic snakes around the broom handle and spiders in the bristles.

clip_image004

Silhouettes make decorating easy. You can purchase spooky silhouettes or easily make your own using black paper such as teachers use for bulletin boards. Put silhouettes in windows for a fun Halloween decoration- you want your guests to start Confused smile“squirming” with fright before they even get to the door.

Don’t want to make your own silhouette- the cat pictured is actually a Martha Stewart Halloween Witch Silhouette Window Cling. This image clings to glass or mirrors and can be reused year after year.

clip_image005


SQUIRMY TRICKS-

Squirmy Vampire Soap

clip_image006

You will need a small jar, laxative tablets (over the counter product at pharmacy), rubbing alcohol, soap and water.

In the jar, crush one or two laxative tablets and add a tablespoon of rubbing alcohol.  Rub some of the mixture on your hand and allow to dry.  Then wash it off with soap.  The soapy water will turn bright red! 

NOTE:  Do not eat or drink this solution.

What happened? The laxative contains a substance called phenolphthalein, which turns bright red when mixed with an alkali base like soup.

HALLOWEEN TREAT

Squirmy Peanut Butter Eyeballs

image

Ingredients:
2 cups powdered sugar
½ cup creamy peanut butter
3 Tablespoons butter, softened
½ – 1 pound white chocolate candy coating
Small bag of M & M’s or Skittles
Tube of red decorator frosting

clip_image009

1. Blend peanut butter and butter until creamy. Add sugar. Continue beating until it comes together and is about as thick as thick cookie dough. When well blended shape into 1 inch balls and put in the fridge on waxed paper to chill until firm. (30 minutes)

2. Melt the white candy coating in the microwave. Microwave in 60 second intervals stirring at the end of every minute until candy is smooth and creamy. Dip peanut butter balls in the candy coating and place back on your waxed paper. Immediately press a candy on top to make an iris. Place back into the fridge until set.

3. Using the tube of red decorator frosting make red squiggly blood vessels.

HINT: Since taking these photos we have found that to clean your eyes up a bit, use a paring knife to cut the excess candy coating from the eyeball- it will give your eyeball a cleaner look.

clip_image010


HALLOWEEN GAMES to make you Squirm

Worms in a Pie

image

You will need gummy worms, whipped cream and aluminum pie plates. Place gummy worms in the bottom  of the pie plate and then cover with whipped cream.  On the word “go” players try and eat as many gummy worms as they can find in the cream.  You can award prizes for the most worms found or most worms found in a time limit.  For extra fun, blindfold the contestants.

Bouncing Eyeballs

image

Take a ping pong ball and decorate with markers to look like blood shot eyes. Then get plastic pumpkin or party cups. Now give each child an eyeball and place the plastic pumpkin or cup at the bottom of stairs or across the floor. Have each player toss or bounce the eyeball down the stairs or across the room. The goal is to see if their eyeball bounces into the pumpkin. You can give a prize to those that get it in the pumpkin. Also for young kids, you may want to place paper cups together and have each cup worth a prize.

Speaking of “eyeballs”…

SCARY STORY to make you SQUIRM-

The Legend of White Eyes

I didn’t write it nor do I know where it came from- maybe it really is a true story and came from the pages of my history book. I’ve heard a lot of scary stories when I’ve been camping but this is the only story that made me scream- I hope you scream too.

Advance preparation- besides practicing the telling of this tale you will need to take a ping-pong ball and cut it in half. Color a small dark dot on each half with a permanent marker. These will be your “white eyes”. Keep them concealed in a closed hand. When the time is right, pop them on over each eye. (You may customize place names in your story to suit the occasion) NOTE: I would wait to tell this story until the little ones in your family had been tucked into bed.

clip_image013

There on that side of the lake (point) is where this story took place. As you all may know, the area around here was a busy place 100 years ago due to the Gold rush. Miners turned this whole region upside down in a quest for GOLD!

Greed can be a dangerous thing, especially where Gold is involved. To find more gold meant faster production, and digging deeper underground. It also meant sacrificing safety, but they didn’t care because there were a lot of foolish men around looking to make their fortune.

One day an underground mine collapsed with 16 men still waiting to come up from a full day’s work. Hour after hour went by as they awaited their rescue. The conditions were terrible. It was pitch-black dark, and very hot, dry and dusty down deep in that shaft. The men collected droplets of water that seeped down the tunnel walls in an attempt to satisfy their dying thirst. Days went by and still no rescue. To stave off hunger, they ate rats, mushrooms, and eventually… their dead co-workers.

(Throw a log on the fire for dramatic effect! Poke away at the embers.)

Despite their hopelessness, they scraped away at the rock and debris to try and dig their way out, confident that others would be digging from the surface as part of the rescue attempt. They dug and they dug, day after day, frantically hoping to see daylight from the surface. The days stretched into weeks, and then from there, the few men left alive lost track of time, and started losing their minds.

An eternity later, the survivors finally broke through, and made two very surprising discoveries. One: there was no search party. The mining company had abandoned the mine, and simply walked away. And two… all that time underground had affected their eyes… Their eyeballs were all white, except for an itty bitty black pupil. And they could no longer tolerate sunlight. 

Being left for dead was bad enough. Turning into some sort of White-eyed freak was too much. They snapped. In their rage they made a pact to hunt down every man who abandoned them in that old mine. And soon after, mysterious instances of men being killed in the mountains around here started.

The locals at first thought it was a bear or a cougar doing all the killing. The victims were usually found mauled, bloody and torn. But; closer examination showed the teeth marks on the bodies… were from human teeth!!

(Throw log on the fire!)

One by one, those white-eyed freaks killed off every miner, and any other man they could find in this area. And to this day, you won’t find any mining around these parts. Keep in mind this all happened 100 years ago. You’re probably wondering what happened to those white-eyes?? They should all be gone now due to old age, or at least that’s what they thought… until a few weeks ago. I heard on the radio, they found a hiker mauled on that trail on the backside of the lake. And on that dead man’s neck… human teeth marks!!!

Heed my words, kids: As long as you’re close to the fire, the light will scare ‘em away, but if you need to go into the dark… (pop in the ping-pong ball props)

BEWARE of the WHITE-EYES!!!!

Aaagghhh!!!!

HALLOWEEN SQUIRMY SONGS

Road Kill Stew
(Tune: “Three Blind Mice”)

image

Road kill stew, road kill stew.
Tastes so good, just like it should.
First you go down to the interstate.
You wait for the critter to meet it’s fate.
You take it home and you make it great.
Road kill stew, road kill stew.

Squirmiest Song Ever

clip_image016

Nobody likes me; everybody hates me;
Guess I’ll go eat worms.
Chorus: Long, thin, slimy ones; short fat juicy ones;itsy, bitsy, fuzzy, wuzzy worms.

First you get a bucket; then you get a shovel;
Oh, how they wiggle and squirm.
Chorus

Next, you pull their heads off, then you suck their guts out;
Oh, how they wiggle and squirm.
Chorus

Down goes the first one, down goes the second one;
Oh, how they wiggle and squirm.
Chorus

Up comes the first one; up comes the second one;
Oh, how they wiggle and squirm.
Chorus

Everybody likes me; nobody hates me!
Why did I eat all those worms?
Chorus

Chop up their heads, and squeeze out their juice,
And throw their tails away.
Nobody know how I can survive
On worms three times a day!

Sneakers
(Tune: “Auld Lang Syne”)

image

Should old worn sneakers be thrown out;
Or stink upon a shelf?
Should holey, moldy, gym socks walk
To the washer by themselves?
My smelly shoes, so torn and rank;
How comfortable to me!
My gym socks match them perfectly;
Let’s my piggies wiggle free!


Halloween Party Jokes

image

Q: What do you call a ghost in a torn sheet?
A: A holy terror

Q. What do you call a witch who lives at the beach?
A. A sand-witch.

Q. What do you call a witch’s garage?
A. A broom closet.

Q. What is a Skeleton’s favorite song.
A. Bad to the Bone.
Q. Why can’t a Skeleton Lift Weights?
A. He’s all bone and no muscle.

Q. What is a Mummie’s favorite type of music?
A. Wrap music!

Q. Why don’t mummies take vacations?
A. They’re afraid they’ll relax and unwind.

Slime Recipe

image_thumb2

I was going through some old family reunion papers and found this fun recipe for Ooey Gooey Gax- some people call it “slime”.  Kids love Gax/slime and it’s a perfect party craft especially if you’re outside.

Ingredients:

2 Tablespoons white glue
2 Tablespoons water
3-4 drops food coloring
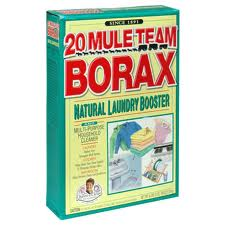
1 Tablespoons Borax – usually found in the laundry detergent section of your grocery store
Plastic bag for storing Gax
image_thumb6

Directions:

  1. Mix 1 Tablespoon of Borax powder to 1 cup warm water.  Stir until all the powder has dissolved.  This makes sodium borate.
  2. In a smaller separate bowl, mix 2 Tablespoons glue and 2 Tablespoons water and stir well. 
  3. Add 3 drops of food coloring to the glue/water mix and stir.
  4. Add 1 Tablespoon of the sodium borate to the glue/water mixture.
  5. Stir and let sit for a few minutes and then it will be ready to play with.
  6. Place in an airtight container (Bag).

Hints: Don’t leave Gak on fabric, vinyl or wood.  Do not eat Gak.  Make a batch of Gak before getting to your reunion so you know how it works.

This recipe only makes a small batch.

To make Glow in the Dark Slime: Add several drops of glow-in-the-dark paint during the mixing in stage 1.

The cute graphics you see on this page may be purchased from-

http://delightful-doodles.com

image

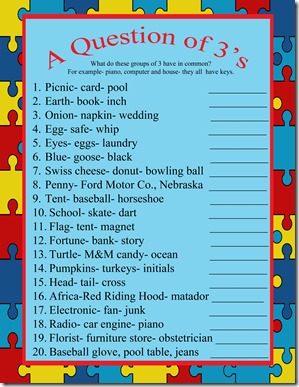
A Question of 3’s

A printable version of the Tribond game

Question of 3_edited-1

One of our local radio stations is having a contest.  They give you three words and you have to to figure out what the three words have in common.  The example I heard on the radio was- Penny, Ford Motor Company, Nebraska.  I was pretty excited when I  figured it out. (Too bad I was driving and couldn’t call the station to win my prize.) 

It did give me an idea of a printable game I could share on familyreunionhelper.com and after doing some research, came up with the  printable game that I call “A Question of 3’s”  All you need is a copy of the  game  for each player which you can find below and a pencil. Oh, and the answer to the puzzle I heard on the radio- they are all Lincolns.
Answers

1. All are tables
2. All are worms
3. All have rings
4. All are cracked
5. All have whites
6. Types of berries
7. All have holes
8. All have Lincolns
9. All are pitched
10. Types of boards
11. Types of poles
12. Types of tellers
13. All have shells
14. All can be carved
15. Types of winds
16. All have capes
17. Types of mail
18. Can be tuned
19. Make deliveries
20. All have pockets

Fun T-shirt Idea for Your Family Reunion

A brand new idea for family reunion t-shirts!

20170203_113627

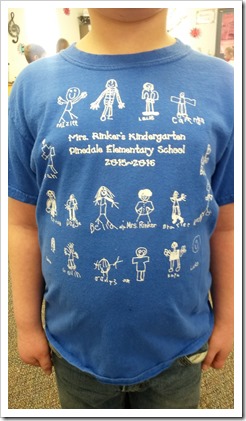
One of my students wore this shirt to class one day and of course when I saw it I started thinking “family reunion”.  If your family isn’t too big this could be a fun idea for your next family reunion.

Ask family members to draw a simple picture of themselves.  The most difficult part of this
project will be getting the drawings returned to you.  If you have enough time you may want to get the drawings at your family Christmas party and then you would have  them for your  summer  reunion.

My  “go to” t-shirt company is

http://www.cheaperthanshirt.com/

Kdee, their designer,( Kdeewood.au@gmail.com ) is so good to work with and can arrange your drawings on your shirt so they look great.
If you don’t have room on  your shirt for people to draw their whole body you can just do “heads”.
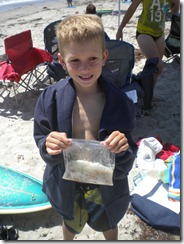
Image result for stick figure head family 

Thanks to Mrs.Rinker and her kindergarten kids for this fun new idea for family reunion t-shirts.

Build Your Own Pizza Party

Build Your Own Pizza and Team Pizza Building
pizza party blog

Most families like pizza and for many families, pizza is part of their Friday night fun,  but skip ordering take out and try one of our pizza party ideas with a twist. 

DSCN4207

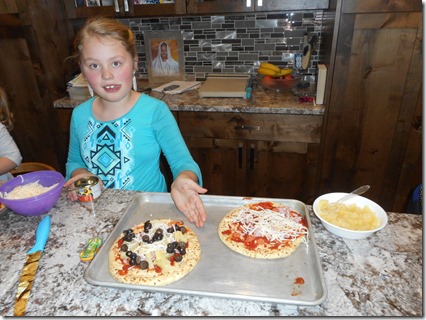
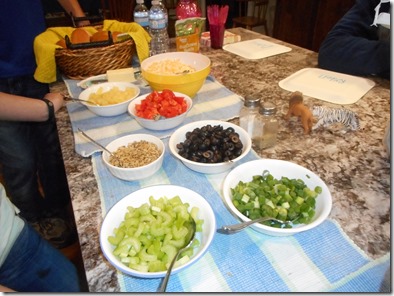
Pizza Bar

A favorite pizza activity of our kiddos is making their own own pizzas-  This is a great way for kids to create their own  custom  pizza and you know they’ll eat it because they get to choose their own toppings.

The only tricky part of a Build Your Own Pizza party is choosing the crust you want to use.  You can make your own pizza dough or buy a  premade crust.  Pictured below are some options.  We have also used English muffins, French  bread or  pita bread, left whole, for crust.   If making your crust from scratch be sure to keep each crust “personal” pan  size.

Image result for pizza crust    

Set out popular pizza toppings.  To get you started, the 10 most popular pizza  toppings are listed below and are a good place to start:

  1. Pepperoni
  2. Mushrooms
  3. Onions
  4. Sausage
  5. Bacon
  6. Cheese
  7. Black olives
  8. Green peppers
  9. Pineapple
  10. Spinach

Our family would include barbeque chicken and Canadian bacon to that list. You might also want to consider offering a white sauce and a red sauce as options for your pizza bar.

DSCN4235

Pizza Making for Teams

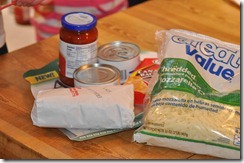
To add some suspense to a traditional pizza party, divide your family and friends into teams.  Give each team a premade pizza crust, a jar of pizza sauce and a bag of cheese.

Cute hors3e [pictures PC condo 393

Wrap pizza toppings in gift wrap or newspaper and let each team pick 2 or 3 of the wrapped toppings.  These are the toppings that they must use on their pizza.  They won’t know what toppings they have picked until they unwrap their packages.  Decide if trading toppings will be allowed.

Cute hors3e [pictures PC condo 386

After all the teams have “decorated” their pizzas and baked them, set them out for all the teams to try.  Cut pizza in small slices so there are lots of samples.  You can even give prizes for the most delicious pizza creation.

The challenge with any pizza party is getting them baked.  Individual pizzas are great because you can fit more that one pizza in your oven  at a time.  As pizzas bake you may want to play an ice breaker game to keep your guests entertained.  You can find some our favorites HERE.

The $2.00 Dinner Challenge

Making Dinner Fun!

A funny dinner tradition for your family

2

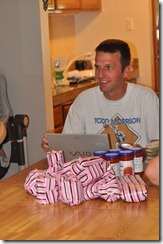
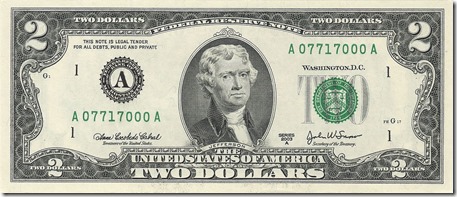
When my children were little we called it the $1.00 dinner challenge- you could buy a lot more for $1.00 back then.  Now call it the $2.00 dinner challenge but  we still have as much fun as we did in the days when a dollar could actually buy something.

US_$2_bill_obverse_series_2003_A

I’m not even sure where the idea came from,but the dinner challenge became a tradition that we would do  when a cousin came for a sleepover.  This is not a tradition for a huge group of people such as an extended family reunion but it’s a ton of fun for a more manageable group of aunts, uncles and cousins.

DSCN2554

Here’s how it works-

Give everyone in your family $2 in cash. (Or whatever amount you feel is appropriate) As a family, go to your local grocery store. Walk around the store and look for food that you can purchase for $2. When you’ve looked around a bit, choose the item you want to serve for dinner, pay for it and wait  for  everyone in  your family to finish shopping.  (You want to keep your purchase a secret from the  others but it is best to shop in teams especially if you have younger children.)

Our grandchildren are 10 years and  younger (mostly younger) so we had each child team  up with an  adult.  They put their money together so each team had $4.00 to spend.

DSCN2553

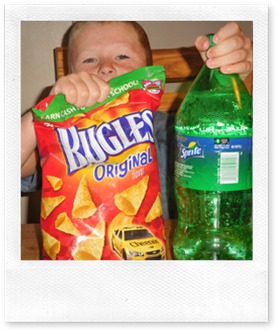
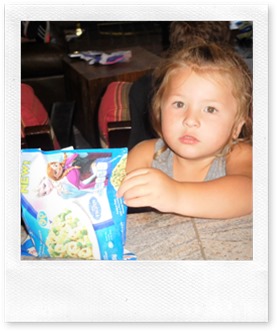
Our grandkids get so excited about what they have  purchased they can hardly stand the car ride back to the house to prepare their food.  We have to juggle time in the kitchen mixing, baking and microwaving but eventually everyone is ready and we all sit down at the table to our $2.00 challenge feast.  Even the pickiest of eaters will find something to eat at this table- because they choose it!

Some helpful  hints and a funny story- Set some  guidelines such as, Can  two people put their money together? Can you purchase a dessert item? How long do you have to prepare  the food when  you arrive home?  etc.

One year my niece choose  Jell-O for her food  item.  It would’ve taken hours for the Jell-O to set up but we prepared it anyway and ate  it for a  late night snack.

Does your family to take the $2.00 Challenge?

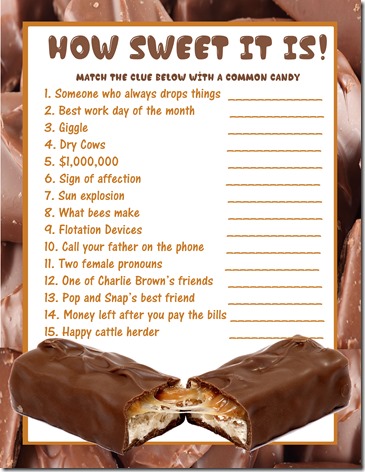
How Sweet it Is! Candy Match Game

A pretty sweet printable game- and it’s free!

guess the candyz_edited-1

Whenever I plan a  I party or a family reunion I like  to have an activity  or game that people can play when they first arrive. The goal is to get family members, or friends, laughing and talking  with each  other.  The “How Sweet It Is” free printable fits the bill and coming up with prizes for the winners is  a snap- candy bars!  I suggest the snack size because you’ll probably have several winners.  This ice breaker game is great for large or small group games and for family members of most ages. You can download the free printable by clicking below.  Don’t forget to download the answer key.

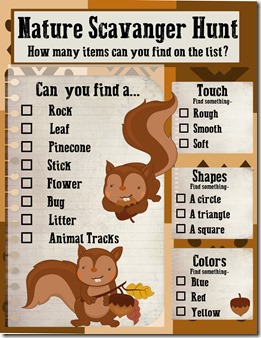
Nature Scavenger Hunt {with free printable}

Nature Scavenger Hunt-  fun activity for your family reunion

Nature scavenger hunt

If your family reunion location  is at a park or a campground this Nature Scavenger Hunt  is a wonderful excuse to get outside, have some fun, and spend time together as a family.

Just  print off our fun Scavenger Hunt printable on heavy cardstock and  give everyone a copy along with a pencil and let the fun  begin.  You can  work as teams or individually, it can be a  race or a contest to see who finds the most items. Allow everyone an opportunity to show off their favorite find.

You can  find the link for our Nature  Scavenger Hunt below- or right-click on the picture above, save it to your computer, and print.

Potatoes in a Bag

A Delicious Idea From My Nephew, Brayden, for Your Family Reunion

Sometimes I get in a rut- I forget that some people don’t pack up and head for the mountains when they plan a family reunion or family gathering- instead they head for the BEACH!  And it was to the beach we went for a fun family party with my brother and his family. 

We packed up the surf boards, sunscreen and mashed potatoes- yes, MASHED POTATOES!  “Potatoes in a bag” is a fun and easy tradition Uncle Brett and Aunt Lisa have implemented in their family and would be a yummy idea for your family reunion no matter what location  you choose.

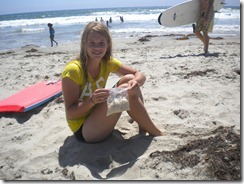
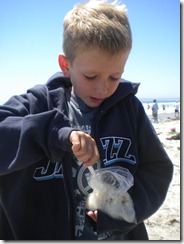
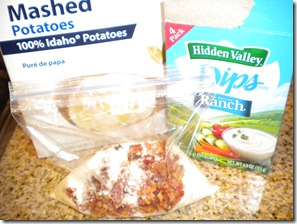
Most of the prep for “Potatoes in a bag”  was done at home.  Everyone measured 1/2 cup potato flakes in a plastic baggie and added their favorite “mix-ins” to give their bag of potatoes their own special flavor.

DSCN0373

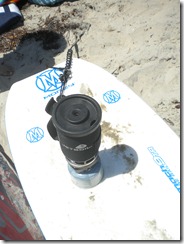
At the beach, Uncle Brett heated up the water in his portable heater.  When the water was hot we added 1 cup to our bag of potatoes and squished it up in the bag until it was well mixed and creamy.  The potatoes were delish!  The beach was chilly  and wet, and the hot potatoes were a welcome treat.

Directions: Mix 1/2 cup of potato flakes with 1 cup boiling water.  Stir until blended. Add your favorite mix-ins: salt, dry ranch Salad dressing, dry onion soup mix, Butter Buds, dried parsley flakes, beef jerky pieces, diced cheese stick and a beef stick. For thinner potatoes, add more water; for thicker, add more flakes.

DSCN0411

If you’ve done eggs in a bag at your family reunion I think you’ll have fun with this idea.  Set out all the ingredients and mix-ins and let your family create their own delicious mashed potatoes.  Your bigger eaters may want to use 1 cup of potato flakes with 2 cups of water.

Thanks, Brayden, for a delicious family reunion idea! And if you’re looking for fun beach themed ideas for your family reunion, check out our Beach family reunion for lots of fun in the sun ideas.

Beach Family Reunion

Beach Reunion


Aunt MO

NOTE: Whenever you add boiling water to your baggie, always use heavy-duty or freezer zip lock bags. Although there have been no claims of injury or illness, Ziploc® states their baggies are not intended to be used at high temperatures, so use at your own risk.

Be Sociable, Share!

The Latest Trend in Family Reunion T-shirts

birth order t shirts1

I LOVE family reunion T-shirts!  They are the ultimate “party favor” or “souvenir” that family members can take home with them after the reunion fun is over. Reunion T-shirts are a  reminder of the good times had at that years family reunion. 

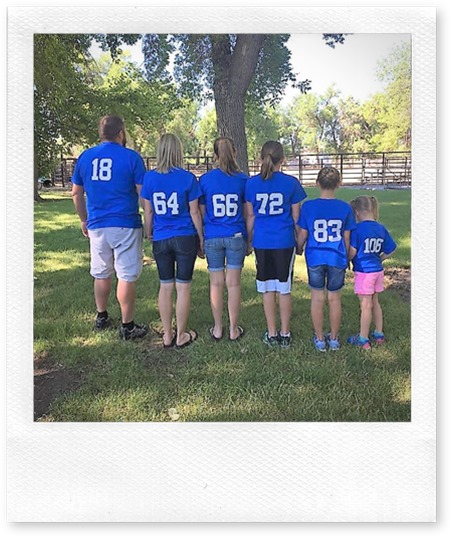
There’s a new reunion T-shirt trend going around and I think it’s great!  We used to take family pictures at our reunion  like the one  below (we used paper plates  with  numbers on it). 

Image result for family reunion birth order shirts

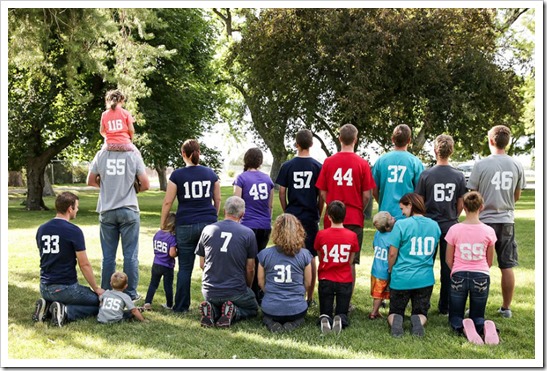
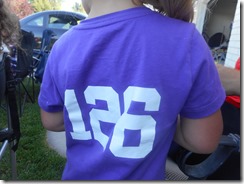
But now, families are  having fun applying this idea to t-shirts. Each family has a different color, and each t-shirt gets a number on the back representing the order you joined the family (through marriage or birth).

DSCN5166

You can have each generation be a color and the in laws all have their own color as well. Then, every person is either numbered according to birth order (by generation) or by when they married into the family.

If there are people at the reunion who aren’t yet married into the family, you can give them a shirt with a question mark on it as in, who will be the next lucky member of the family?”

When it comes to  figuring out what  number everyone  is your  most valuable resource will be the matriarch of the family. Make a list of each  family member and when they became part of the family.  You may want to ask your family to email you their birthdates and anniversary to make  sure your list is accurate.  Email  the completed list to your family so they can double  check your  numbers.

DSCN5165

A  common design for  the front of the shirts is  a  fun idea.  You may  want to have a  t-shirt company  print the  common design on the front  of each shirt  and then apply the numbers yourself, especially if you are doing multiple  colors.

t  shirt

Of  course, you’ll  want to  take a  family picture.  Take  a picture with everyone facing forward and then do a second photo of  the  back of the shirts. I  just love  this latest trend in family reunion t-shirts. If you decide  to do this at your  reunion, send us  a photo and we’ll feature your family on our  website.