3 Keys to a Successful Family Reunion

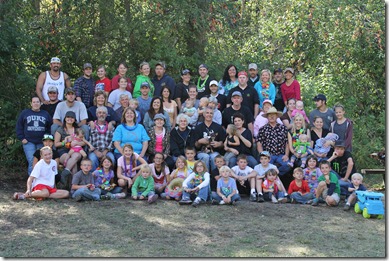
brad's camp pictures 629

Planning a family reunion can be a nightmare. But the good news is that you are not alone, we can do this together. I don?t know your specific situation but I can tell you that if you will follow these 3 important keys you will be on your way to having a successful family reunion. So let?s get to work- first key is…

Choose a permanent reunion date

This is the most important aspect of reunion planning- it’s not much of a reunion if no one can attend.

When we began planning the “Stewart” family reunion we were only working around about 20 people and it was fairly easy to find a date that was good for everyone, but now that we are more than 100 family members strong we would never be able to find a date that met everyone?s needs. Lucky for us, about 20 years ago we set Labor Day weekend as the permanent date for our family reunion.

We have found that holding the reunion at the same time every year helps family members plan their busy lives around that weekend. They always know when the Stewart reunion will be and although the location may change the date never does. Unbelievable but true- we usually have all but about 3 family members attend our reunion each year.

If you can?t choose a permanent date, plan your next reunion date before you end the reunion you are currently attending. Planning in advance will increase the odds that more people will be able to attend the reunion, which translates into more fun for everyone. If you book early, you can most likely get better rates and/or reserve your preferred hotel or retreat site, flights and other travel arrangements. Most campgrounds and parks can be booked a year in advance.

Last of all, stick to your decision. Changing dates in the middle of planning can create a huge amount of anxiety and additional work.

Delegate!

People always wonder why we have such good attendance at our reunions and I tell them, “Because everyone has a job!” There is always someway that everyone can contribute to your reunion no matter what their age or their ability. You can assign a couple of pre-teen girls to do a story time or games for the younger children at your reunion, ask a 5 year old to bring a can of olives or assign someone that loves music to lead a sing- a- long.

It’s impossible to organize a reunion by yourself, I know, because I„ve tried it. Not only that, but it is good to have the input of different family members’ points of views. Family members that have a responsibility feel greater ownership in the reunion.

Delegate tasks according to those with special talents, skills and connections. Our Uncle Ben owns a restaurant whose specialty is turkey steaks and quite often we have turkey steaks at our reunions or family parties. We have great Dutch oven cooks in our family and of course, we give them the opportunity to practice their skills. Use the resources that you have.

There are certain jobs at our reunions that have become tradition- for instance cousin R.D. and Uncle Richard always make the homemade root beer, Aunt Lynn is always in charge of Bunko and Uncle Steven always makes his Dutch oven potatoes.

So how do you put all these people and their great ideas together? Let me tell you how we do it. There are six original children in the Stewart family; we call them the “Big 6”. We schedule a planning meeting and ask that there be a representative from each Big 6 family at the meeting. These people become your liaison from each branch of the family.

At the meeting we discuss our plans and make assignments, that way every family has a representative and if they have concerns they can be addressed at that meeting and each families? fun ideas can be implemented. We ask for volunteers to be in charge of each major aspect of the reunion – food, family history, invitations, photography, games and activities, finances and facilities. The chairman of the committee, that?s me, takes the ideas and suggestions home and makes a master plan or schedule which is emailed to the committee members for their approval.

A reunion committee is essential to planning a smooth, successful family reunion. Be sure your chairman (if you?re reading this than the chairman is probably YOU) is creative, energetic and willing to put in the time and effort required to organize a reunion.

Planning a family reunion is a too big a job for one person, so make a checklist, get some help, put your entire family to work and let everyone share in the satisfaction of a job well done!

Select a Theme!

A theme gives your family get-together an added twist that can build excitement. Choosing a theme for a family reunion is a great way to interest people and make them more likely to attend your reunion. Who wouldn?t want to attend a “Caveman” reunion? A theme also makes it more fun to plan when it comes to being imaginative with food, games, activities, invitations and just about every other aspect of the reunion.

If you have a wedding anniversary or a significant birthday coming up in your family you could choose to celebrate around those special events. If your grandparents were married in the 50?s, plan a fifties reunion complete with poodle skirts and sodas. If Aunt Addie will be turning 70, celebrate with her by having a seventies party- make tie-dyed shirts and decorate with peace and flower power signs.

Just because it is a family reunion doesn?t mean the theme has to be centered on the family itself. Plenty of other party themes are perfect for a reunion. Plan a western, caveman, boot camp or other similar theme.

A few years ago my sister-in-law suggested that we have a caveman reunion and I was pretty nervous about it- caveman? How do we do a caveman reunion? But we all shared ideas at our planning meeting and guess what- our caveman reunion turned out to be one of our best family reunions ever.

Whatever theme you choose, design your decorations, food, activities and games around that theme. Your caveman theme might feature Brontosaurus burgers and a dinosaur egg hunt or a pirate theme might include Barbecued Parrot and a treasure hunt.

Planning a family reunion requires serious effort and thoughtful strategic planning but if will follow these 3 important keys you will be well on your way to a memorable and successful family reunion. And who knows- maybe they?ll want you to be in charge next year too.

Aunt MO

Click here to download a PDF version of the 3 Keys to a Successful Family Reunion

Family Reunion Hot Wheel Party

I love to do family reunion presentations to church groups and women’s conferences.  At my recent presentation one of the dear grandma’s that attended expressed some concern about doing a three day family reunion and it occurred to me (kind of like one of those “could’ve had a V-8 moments in the commercials)- have I ever mentioned that your reunion doesn’t have to last three days or two or even all day?  A family reunion can be a fun afternoon with your family at the park, swimming pool or the family homestead.  Any time you can get together as a family is a good thing and counts as a family reunion.

So I thought I’d tell you about a fun party idea for abbreviated family reunion.  My family loves to have their own car races- Pinewood Derby or Hot Wheels race.

clip_image002

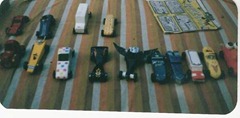
If you know anything about scouting you know how fun and popular a Pinewood Derby can be. About 10 years ago we had derby at our family reunion. We let anyone that wanted to participate bring a derby car. It could be one that they had made in the past or one that they made just for our derby. We awarded prizes for how the cars looked and how they performed.

We arranged for a man in our local to bring his derby race track and timer for our event. He charged us $20.00. Our reunion was held at a campground and we asked the camp hosts to be the judges at our derby. We invited them to stay for Dutch oven cobbler after the races and I think they really enjoyed being part of things. We gave trophies for the fastest car and also gave out the following awards:

clip_image004

Best Paint Job
Most Colorful
Most Realistic
Most Original
Best Workmanship
Best Funny Car
Coolest Design
Most Unusual

image I heard of a family that passed out unfinished Pinewood Derby kits to their family as they arrived at their family reunion.  They gave them an hour to put their cars together and make whatever alterations they wanted to their car.  When the hour was up they began the race with roughly finished cars.

It was quite surprising to me how excited everyone was about participating in the derby. One of my nephews even had his car professionally painted.

clip_image007

Hot Wheel Car Races

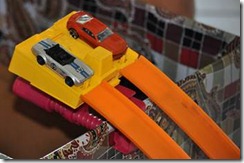
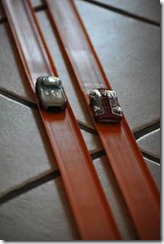
When my brothers and I were little we used to have Hot Wheels races and the tradition continues with our children today. In fact, if any of my nieces and nephews read are reading this blog just remember Aunt MO ALWAYS has the fastest car!! The track we used to use is now orange “vintage” track and you cannot buy it at the store or online. However, you can, always find it on eBay. The most important part of your race is the starter which you see pictured here.

clip_image010

We love to get Hot Wheels cars in our Christmas stocking and then have a “race day” during the holiday. At other times of the year we converge on the local toy store in search of the fastest car rolling them back and forth in their clear containers and checking them for weight. We limit everyone to just two entries in our double elimination tournament.

clip_image012

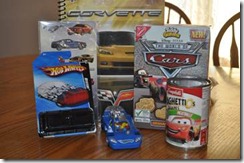
I’m always on the lookout for Hot Wheel and Nascar type prizes and store them in a box until the next family race day. Notebooks, stickers, candy and even Spaghetti O’s make fun prizes for your race.

clip_image014

One final idea that I have never tried but sure sounds fun is to play a car relay race as a warm up before the big race.

CAR RELAY GAME: Have teams line up and each person in the team has a certain action to do. For instance, the first person in each group is a flat tire and hops on one foot; the second person is a broken steering wheel and runs zig-zag; the third person is a rusty transmission and takes three steps forward and two backwards; the fourth person is stuck in reverse and runs backward; the fifth and sixth people are a car with a trailer – one runs behind the other grabbing on.

The movie “Cars” sure made it easy to find auto type decorations and novelties.  Wilton put out a Cars cake pan that was fun and fruit chews and cookies helped complete the party theme.

image Gentlemen, start your engines…

Aunt MO

A difference of opinion is what makes horse racing (car racing) and missionaries. Will Rogers

Are You Ready for Christmas?

Take this test to find out if you’re ready for Christmas                           A fun icebreaker game for your family Christmas party

image

If you have attended a Christmas party give yourself 1 point, if you hosted a holiday party give yourself 5 points. If you didn’t yell at anyone while you were setting up for the party give yourself 2 extra points.

Give yourself 1 point if you’ve started you Christmas cards, add 5 points if you’ve mailed them. If you sent your holiday greeting on Facebook deduct 2 points.

Give yourself 1 point if you’ve started Christmas shopping and 5 points if you’ve finished all of your Christmas shopping. If you had to pay 2-day or overnight shipping on an online order so it would get here on time deduct 2 points.

Give yourself 1 point if you’ve begun your Christmas baking, and 5 points if you’re all done. If you put sprinkles on something give yourself 2 extra points.

image

Give yourself 1 point if your gifts are all wrapped and 5 points if you wrapped them yourself. Deduct 2 points if you paid someone to wrap them.

If you have purchased your Christmas ham give yourself 1 point. If you have purchased a Christmas turkey give yourself 5 points. If you shot a Christmas goose, give yourself 2 points.

Give yourself 1 point for each item you’ve eaten in December: sugar plums, a roasted chestnut, Figgie pudding, Christmas goose or eggnog. (5 points possible)

If you are wearing something red or green give yourself 1 point. If you are wearing a Christmas sweater give yourself 5 points. If you are wearing Christmas underwear give yourself 2 extra points. (Must be willing to prove it.)

If you have sung “Jingle Bells” this Christmas give yourself 1 point, if you have gone caroling, give yourself 5 points, if you have performed in a Christmas play, program or concert give yourself an extra 2 points.

image

If you have watched the movie, “How the Grinch Stole Christmas” give yourself 1 point, if you have watched “It’s a Wonderful Life” give yourself 5 points.

If your birthday is in December give yourself 1 point, if it is Christmas Day give yourself 5 points.

If you’ve seen Santa this year, give yourself 1 point. If you’ve sat on Santa’s knee give yourself 5 points. If you’ve kissed Santa give yourself 2 extra points.

If you’ve put Christmas decorations outside your home, give yourself 1 point. If you checked to see if they were working give yourself 5 points. Take 2 extra points if your lights were still working when you after put them up.

image

If you will have 10 or less people at your table for Christmas dinner give yourself 1 point, if you will have more than 10 people at your table for Christmas dinner take some headache medicine, put your feet up and give yourself 5 points.

25 points or more– Congratulations, you’re ready for Christmas! Christmas is definitely your thing. You love every minute of the holidays.

15- 24 points- You’re getting closer! Just a few more presents to buy and it’ll be time for some hot cocoa!

Less than 15 points– It’s not Christmas yet! RIGHT? Going shopping now…

Merry Christmas from www.familyreunionhelper.com

Aunt MO

“ I once bought my kids a set of batteries for Christmas with a note on it saying, toys not included.”
Bernard Manning

Twelve Days of Christmas Nativity

image

On December 13th, there are officially 12 days left until Christmas! A fun and creative Christmas tradition I remember from my childhood is called "The Twelve Days of Christmas. It all starts on December 13th and continues up until Christmas Eve, December 24th. My favorite “12 Days of Christmas” is to leave one nativity piece each night and at the end of the 12 days the family will have a complete nativity scene.

First, chose a family or individual who would appreciate a little extra Christmas joy and each day, starting on the 13th, a leave a small gift for that person, anonymously.

The next step is to find a nice nativity scene, preferably with 12 pieces. Twelve piece nativities are pretty easy to find however, this year I was only able to find an 11 piece set so will also do a string of white lights, oval mirror to display or a star shaped ornament for their Christmas tree. I paid $19.00 for my nativity set.

Beginning 12 days before Christmas, deliver one piece of the nativity to your selected family. This Christmas tradition is especially fun if you are doing it with kids. Kids love to doorbell ditch and will quickly get into the Christmas spirit by taking part in The Twelve Days of Christmas. We try to do this after dark, or leave the nativity pieces on the porch when the family isn’t home. Important- don’t get caught! It’s much more fun to remain anonymous!

You may want to attach a nativity scripture to each nativity piece. You can find a free download of suitable scriptures at www.familyreunionhelper.com.

Deliver one piece of the nativity each night for 12 nights– the last one being baby Jesus on the Christmas Eve, December 24th.

Aunt MO

Christmas waves a magic wand over this world, and behold, everything is softer and more beautiful.  ~Norman Vincent Peale

Slide Box Ornament for Your Christmas Tree


DSC_1526x

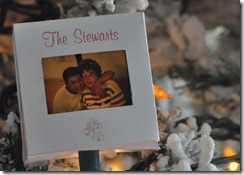
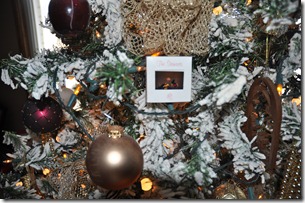
For the last 50 years my family has recorded their favorite family memories on photographic slides that can only be viewed with a slide projector.  As much as I love gathering the family together for a slide show I was thrilled when Uncle Steven came up with a brilliant idea for making slide ornaments for our Christmas tree.

Slide ornaments are easy and inexpensive to make.  There is quite a bit of cutting, folding and taping involved but the most difficult part of making slide ornaments is choosing the slides you want to display on your tree.

It is fun to use slides from past Christmases, family reunions or especially embarrassing for children and fun for parents is to use pictures of children when they were small.

 DSC_1534

Because we were making over a hundred slides we had a print shop print our ornaments and they even scored the fold lines.  You will want to use a higher end grade of card stock, one that has been coated in either or matte or gloss finish.  We used the gloss finish.  Both should be available at your local print or stationary store.  You can download a free  slide ornament pattern at familyreunionhelper.com 

We had our name printed on our slide box but  we found that made it a little restricting as we couldn’t use vertical slides in our ornaments without making our name look funny.  I would recommend not using any words or graphics that will limit your options.

DSC_1525

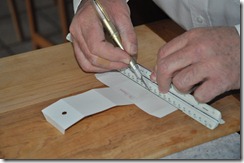
We used a good pair of scissors to cut out our ornaments and an X-acto knife and ruler to cut out an opening for the slide.  Tape the slide  to the inside  of the box then fold and fasten together with doubled sided tape.

HINTS:

Display with white or clear lights.  Your slides will be whatever color the light is.

You can punch the hole for the lights in the top or bottom of the box depending on how you want the ornament to hang.

Store slide ornaments in a shirt box for next year’s tree.  They are are long lasting and make a fun family tradition during the Christmas season.

Aunt MO

“Remember that our blessings outnumber the  lights on the Christmas tree.” Unknown 

Funny Food and Games for Your Family Party

My family didn’t go trick or treating when I was a kid, we attended school carnivals and had fun celebrations at home.  Uncle Steven’s family perfected trick or treating and got it down to a science.  Somehow, when Uncle Steven and I married we took the traditions of both families and through trial and error came up with our own family traditions.  So here’s a few of our favorite food and games for this spooky time of year.  The first is a recipe my daughter, Megan, found and it is so yummy she has been banned from making it again this year- these eyeballs are just so good we can’t stop eating them!

Spooky Peanut Butter Eyeballs

Ingredients:

clip_image0042 cups powdered sugar

½ cup creamy peanut butter

3 Tablespoons butter, softened

½ – 1 pound white chocolate candy coating

Small bag of M & M’s or Skittles

Tube of red decorator frosting

1. Blend peanut butter and butter until creamy. Add sugar. Continue beating until it comes together and is about as thick as thick cookie dough. When well blended shape into 1 inch balls and put in the fridge on waxed paper to chill until firm. (30 minutes)

2. Melt the white candy coating in the microwave. Microwave in 60 second intervals stirring at the end of every minute until candy is smooth and creamy. Dip peanut butter balls in the candy coating and place back on your waxed paper. Immediately press a candy on top to make an iris. Place back into the fridge until set.

3. Using the tube of red decorator frosting make red squiggly blood vessels.

HINT: Since taking these photos we have found that to clean your eyes up a bit, use a paring knife to cut the excess candy coating from the eyeball- it will give your eyeball a cleaner look.

clip_image006

Bouncing Eyeballs Take a ping pong ball and decorate with markers to look like blood shot eyes. Then get a plastic pumpkin or party cups. Now give each child an eyeball and place the plastic pumpkin or cup at the bottom of stairs or across the floor. Have each player toss or bounce the eyeball down the stairs or across the room. The goal is to see if their eyeball bounces into the pumpkin. You can give a prize to those that get it in the pumpkin. Also for young kids, you may want to place paper cups together and have each cup worth a prize.

Mummy Pizzas

My favorite hair stylist, Stephanie, shared this recipe while she was doing my hair on Saturday. Of course, my daughter and I had to come right home and try it! To make pizzas look like mummies just lay strips of cheese pulled from a cheese stick across the muffin for the mummy’s wrappings. This was the hardest part of this recipe for us. Arranging the cheese “just right” takes a little talent- you want the cheese to look like “wrapping” not a picket fence or a white window blind.

clip_image008

Ingredients:

Whole wheat bagels

Pizza sauce or spaghetti sauce

Black olives, sliced

Pepperoni

String cheese

Instructions:

Heat the oven to 350º F.

1. For each mummy, spread a tablespoon of pizza sauce onto each bagel half.

2. Set olive slices in place for eyes. Bake 10 minutes or until cheese melts.

3. Bake for about 10 minutes or until the cheese is melted and the bagel is toasty.

clip_image010

Mummy Wrap

Equipment Needed – One roll of toilet paper for every team. Split into teams of two and give each team a roll of toilet paper. Then one person tries to turn the other into a mummy. Everything has to be covered except the eyes. First team done wins.

Flaming Ghost Cake

Boo! This ghost will surprise and delight your family and friends when you turn off the lights and let his flaming ghost’s eyes flicker and dance. This fun and clever cake is quick and easy to make.  I was given this recipe the first year Uncle Steven and I were married.

clip_image012

Ingredients:

Bake any flavor cake mix in a 9 X 13 pan. Grease and flour pan well so that you can dump it out onto f flat cookie sheet or foil wrapped cardboard. Cut cake into your favorite ghostly shape.

Frost with Grammie’s famous “Fluffy Frosting” recipe.

Grammie’s Fluffy Frosting

Grammie used this frosting in place of 7 minute frosting because you don’t have to cook it. Adding the HOT water is the secret.

Combine in a mixing bowl:

1 cold egg white (reserve egg shell halves)

1 cup granulated sugar

¼ teaspoon cream of tartar

½ cup of BOILING water

½ teaspoon vanilla

Whip on high speed for 10- 15 minutes. Frost cooled cake with fluffy frosting.

Place the 2 egg shell halves you reserved round sides down on the cake for the eyes. Place one sugar cube in each shell half. Make a mouth out of licorice string, chocolate chips or candies.

Just before serving, pour ½ teaspoon of lemon extract over each sugar cube. Light the eyes.

Ghosts in the Graveyard
Choose one person to be the "ghost".

Have everyone but the ghost stand at the home base while the ghost runs off to hide somewhere outside.

Chant slowly as a group, "One o’clock… two o’clock… three o’clock…" and so on, up to twelve o’clock. Then shout, "Midnight! I hope I don’t see the ghost tonight!" Alternatively, "Starlight, star bright, I hope to see a ghost tonight!"

Leave the home base and search for the ghost in the yard. The ghost’s job is to jump out, surprise, and tag a player. When anyone encounters the ghost they should yell, "Ghost in the graveyard!" and try to run away. When the ghost catches someone, they become a ghost too. Anyone who is able to run back to home base is safe.

Have all the people who were caught go and hide with (or close to) the original ghost. The people on the home base start again with the chant, "One o’clock… two o’clock…"

Continue the game like this until everyone is caught.

The last person caught becomes the ghost for the next round.

Extra Easy Pumpkin Cookies

image

Ingredients:

14 ounce can pumpkin mix or use pure pumpkin and add pumpkin pie spices

1/2 cup butter, softened

2 eggs

1 (18.25 ounce) package spice cake mix

Mini chocolate chips, optional

Cream cheese frosting, optional

Directions

  1. Preheat oven to 350 degrees. Lightly grease two baking sheets.
  2. Beat the pumpkin, eggs, together in a large mixing bowl. Stir in the cake mix until well blended and creamy. Add chocolate chips if desired. Drop by spoonful’s on prepared baking sheets. Frost with cream cheese frosting.
  3. Bake in preheated oven until tops are firm when lightly touched, 10- 12 minutes. Cool on racks.

“Crazy” is a relative term in my family!

Aunt MO

Easter Egg Hunt on Horseback!

clip_image002

The best Easter Egg hunt in the entire universe is held the Saturday before Easter at Canna Bay Farms. Humans of all descriptions gather; greenhorns, cowboys and babies as well of horses of all breeds, colors and training, to find Easter Eggs hidden all over the farm. At our Easter Egg hunt it’s not about the eggs- it’s about the hunt!

To make things fairer for the inexperienced and younger riders, Uncle Steven and I hide the eggs according to color. Each rider has a different color or style of egg. For instance, this year we have basketball eggs for Kory, purple eggs for Megan, football eggs for Ryan, chicken shaped eggs for Brynna, pink eggs for Janie and so forth. We’ve been collecting eggs for years, and since we ask everyone to leave their eggs and just take the candy home, we have quite a collection. Assigning each rider their own color makes it possible for us to hide the eggs according to the rider’s ability.

clip_image004Because Megan, Kory and Janie are experienced riders we hide their eggs in places that are hard to see and difficult to get to, but we hide green horn and children’s eggs in plain sight and in places easy for them to reach.

After the hunters find all of their eggs they are allowed to hunt for the golden eggs that have special prizes in them such as movie tickets, gift certificates and coins. This is the most exciting part of the hunt as riders become a little more daring and often find themselves racing for the same golden egg as another rider. I recently read an article about how to hold a “safe” Easter Egg hunt and although I don’t think our horseback hunt would qualify as “safe” I am happy to report that we have never had an accident- I’m not saying we haven’t come close- but no one has ever been hurt.

clip_image002[11]

Our most unusual hunt was the year my son, Kory, used the hunt as a means of proposing to his future wife, Janie. We hid her diamond ring in one of the eggs and everyone held their breath as Janie hunted for her eggs. When Janie found the egg the ring was in, I was so afraid the egg would come open, that I finally had to ask her if she wanted me to hold her eggs while she continued searching for more eggs. Of course, Janie said “yes” when Kory popped the question, and they and their 18 month old daughter live “happily ever after” about 5 miles from us.

After all the eggs are found everyone gathers together to open their eggs and discover the goodies and prizes in them. We usually play badminton and eat Sloppy Joes for lunch.

Tips and hints for a successful horseback Easter Egg hunt:

clip_image010

Because the horses haven’t been ridden much during the winter months they are usually feeling a little frisky for our Easter Egg Hunt. We used to give the riders a plastic shopping bag to put their eggs in but some horses would spook at the crackling noise the bags made so now everyone just wears a hoodie with pockets to put their eggs in.

clip_image002[9]We have hidden as few as six eggs per person and as many as 12. The gold eggs are extra and although we don’t limit how many eggs a person can find, they are pretty good to make sure that everyone finds at least one golden egg.

I always fill extra eggs in case we have an unexpected rider, which happens more often then not.

For more unusual Easter Egg hunt ideas and fun family reunion themes, visit www.familyreunionhelper.com, and check out the “Home for the Holidays” family reunion.

Aunt MO

“If you only have one smile give it to the people you love."

What do Pudgies, Toasties, Jaffles and Hobos Have in Common?

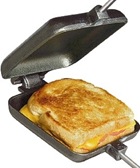
No, we’re not talking about the loved ones that will be attending your family reunion- we’re talking about Pie Irons! Pie Irons are known by many different names, Pudgie Pies, Pioneer Pies, Fire Pies, Toasties and Jaffles, but each name is referring to ingredient-filled "pockets" of bread toasted over a campfire. Cooking with pie irons is a long time tradition at our family reunions.

Camp cooking doesn’t have to be just hot dogs and roasted marshmallows. Our family reunions wouldn’t be complete without a delicious raspberry pie cooked over the campfire and sprinkled with sugar and cinnamon. With a pie iron, you can cook anything from a simple grilled-cheese and ham sandwich to a delicious berry pie for dessert.

In its most basic function, a pie iron is a way to cook grilled cheese sandwiches and fruit pies over an open fire. This is done by placing the food inside the pie iron and then locking the two sides closed with a metal hook. Metal rods with wood handles extend from the castings so the user can easily maneuver the pie iron over a campfire. A few minute over the heat, usually 4 to 6 minutes, and you will have perfectly toasted sandwich or pie.

Pie Irons are available in both cast iron & aluminum. Our family prefers cast iron. They come in several different shapes; round, square, oblong and double. For our family reunions, we only use square irons.product_thumb.php A slice of bread fits perfectly in a square pie iron but the “waffle” pie irons I’ve seen look fun too. Some day I’m going to buy waffle style irons for our family reunion and use them for breakfast. Aunt Lynn doesn’t think she’s had breakfast unless she has had a piece of toast so we’ve even used our pie irons for toast.

To make the most simple of pies, just take two slices of bread (buttered on the outsides), fill with jam, cheese, meat or pie filling- you don’t need much, then place inside the pie iron and lock it closed. Hold it over your campfire for a few minutes on each side and you’ll soon be eating a grilled cheese sandwich or a scrumptious apple pie.

At our family reunions, we like to make fruit pies in the evening while we are sitting around the campfire visiting, singing or playing games. About ten years ago, at a family reunion, cousin Mindy suggested that we sprinkle our freshly baked pies with sugar and cinnamon when we dump it out of the pie iron. Yummy! Some of our favorite flavors of fruit pies are lemon and raspberry. Another family favorite at our family reunions are “Cherry Cheese Turnovers- the recipe is below.

Cherry Cheese Turnover

Cream Cheese

Cherry Pie Filling

Butter or Pam cooking spray

2 Slices of white bread

Butter or add cooking spray to one side of each slice of bread and place buttered-side-out in pie iron.  Fill with a Tablespoon of cream cheese and a Tablespoon of cherry pie filling.  Cook on camp stove or in fire until golden brown.  Sprinkle with sugar and cinnamon.

Pie Irons are great for making ham and cheese sandwiches, individual pizzas and dessert pies but you don’t have to always use bread pockets when you use your pie irons. At our family reunions, we have made omelets and hash brown potatoes in our pie makers. Use your imagination- I even heard of a family that makes Baked Alaska in their irons. That’s a recipe I’ve got to try! Here’s a fun recipe using tortillas.

Quesadilla

10" Flour Tortilla’s

Shredded Cheese

Grilled Chicken Strips

Taco Seasoning

Sour Cream, olives, salsa etc.

Spray both sides of Irons well, with non stick cooking oil. Lay Tortilla in middle of one Pie Iron. Fill with 3 to 4 strips of cooked and thawed chicken, sprinkle 1/8 cup of cheese and taco seasoning to taste. Fold the Tortilla in on all sides, close Pie Iron and cook until Tortilla is golden brown on both sides.  Serve cut in half with sour cream and salsa.

A basic pie iron can be purchased for about $20.00 at Sporting Goods/Camping & Outdoor Stores, BBQ & Kitchen Specialty Stores, Campgrounds, RV Stores, & Hardware stores. I once stumbled onto store liquidation and bought pie irons for $6.00 a piece. I bought every iron they had in stock. An online resource .

You don’t need a pie iron for every person at your family reunion, just cook your pie and pass the iron onto the next person. After you’ve introduced your family to pie irons at your next family reunion everyone will want to have one- selling pie irons might even be a great fund raiser! More great recipes can be found at www.familyreunionhelper.com under “Tried and True” recipes.

“Individually, we are one drop. Together, we are an ocean.” – Ryunosuke Satoro

Aunt MO