A FREE Printable Christmas Game For Your Holiday Party
Take this test to find out if you’re ready for Christmas and find out if your family friends are ready but giving them this test at your holiday party. Merry Christmas!
 |

Gathering your family or friends together for Christmas caroling or a family sing-a-long can make your family party fun and fairly fuss free. Consider these helpful tips when planning your family caroling party.
The most important element of your musical caroling party is the music and you can download a free copy of caroling lyrics at www.familyreunionhelper.com. Caroling will be successful if everyone has the same list of carols. Provide one song sheet for every 2 carolers. Specify how many verses you will sing of each song. One verse is usually enough especially if caroling with children.
To build your song list you can type and print your own caroling sheets or make copies of the family reunion helper caroling book by clicking here- caroling song book. The book is designed so that you only have to print off the music that you will use for your caroling such as- Santa songs, snow songs or spiritual songs etc.
Choose songs that are short, easy to sing, and fun. It’s also best to sing upbeat songs such as “Jingle Bells” and “Up On the Housetop”.You should plan on singing 1 or 2 songs per house and end with “We Wish You a Merry Christmas”.
My family went caroling on Christmas Eve. Mom would choose 3 or 4 families that she knew would enjoy a caroling visit and she always made a few goodies to give them. (Perhaps as payment for listening to us sing off key) We would complete our caroling at a local nursing home. Many of the children were reluctant to sing at the nursing home but as the years have gone by caroling at the nursing home has become one of their most talked about memories of the season. HINT: If you visit a hospital or a nursing home, ask for permission ahead of time to make sure your visit comes at a good time and that they can accommodate a large group.
Jingle bells, cymbals and drum sticks are an easy way to make your caroling fun. Carolers that are too shy or just don’t want to sing can participate by keeping the beat with drum sticks or shaking the bells to the beat.
If caroling outside dress for the weather. When sending out invitations for your caroling party be sure and let your guests know that you’ll be caroling outdoors so they can bring their hats, gloves and scarves. A fun party favor for your party could be hand and toe warmers. You can dress things up by asking everyone to wear a fun Santa hat or reindeer antlers.
At the end of your caroling party meet back at your house or rec hall and provide your carolers with bowls of chili and mugs of hot chocolate and marshmallows or cider. You can keep your refreshments warm in slow cookers while you’re caroling.
I have 2 sons and a son in law and this year I tried something new for their Fathers Day gifts- I let them pick their own gifts. Well, not totally, I put together 3 boxes and after the boxes were filled with surprises and wrapped, then they got to pick their gift.
Each box was different- I had a technology box, builder box and a snack box. Each box contained a gift card and then a couple of things to go along with it. Value of each box was about $30.00.
I wrapped all three gifts in plain old newspaper- nothing fancy about it and with no clue to what was inside.

We had a little competition to see who got to choose their present first but you could do it oldest to youngest or by roll of the dice etc.

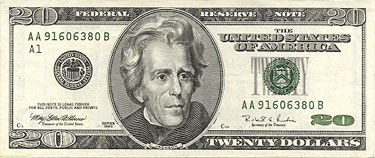
Just as the guys were about to pick their present, my husband put a $20.00 bill on the table and gave them the option to chose the cash instead of a box. There were no takers- everyone went for the boxes.
This is also a fun way to give out prizes at family reunions. Just wrap a variety of prizes and let the winner pick the prize they want from the pile- they get a prize but it’s a little more exciting and extends the fun a little longer.
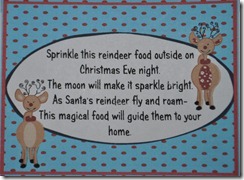
When you sprinkle magic reindeer food on your lawn on Christmas Eve, it leaves a glittering path–and a sweet treat–for Rudolph and Blitzon and their friends.
Make a bag of Magic Reindeer food for each family that attends your party or as an inexpensive stocking stuffer for each child.
Package this simple recipe in zipper food storage bags, and add a free printable gift tag containing the Magic Reindeer Food poem to make Magic Reindeer Food easy to make–and to give.
In a large bowl or container, mix:
1/4- 1/2 cup uncooked oats
1/4 cup red or green sugar crystals
Small sealable bag
Magic Reindeer Food poem (You can find a free printable of the poem at Magic Reindeer Food Poem)

Package Magic Reindeer food in small food storage bags or holiday gift bags.
NOTE: You can use craft glitter in your magic reindeer food but colored sugar crystals (as used for cake decorating) are safer for other animals or birds that may ingest it.
Another fun reindeer games party favor is a bag of reindeer noses.
I wanted the perfect gift for you-
But couldn’t decide just what to do.
I almost sent you a dozen roses-
Instead here’s a bag of…
reindeer noses
Reindeer noses are simply seven brown candies such as “Whoppers” and one red candy (to represent Rudolf). I used sour cherry candies for my red nose. You may find a free printable of the reindeer nose poem below. Just copy and paste into your document.
Log reindeer are the perfect project for your centerpieces. Simply reuse scraps of wood and timber from your woodpile, drill a few holes, and glue it all together. You’ll need a few thicker logs for the body and head; long, thin sticks for the legs, and pronged branches for your reindeer’s antlers. Add bow, bells or tinsel to complete your project. After the party you can give away part of your herd as prizes or save them to give as neighbor gifts.
Bake cupcakes according to package directions and frost generously with chocolate frosting. Top with pretzels for the antlers, a Nilla Wafer for the face, white frosting dots for the eyes, back pearl sprinkles or black icing for the eyeballs, and brown and red candies for the nose.
HINT: We made the pancake base of our Santa pancakes before arriving at the party. Because they are a little time consuming we began decorating them in advance. We noticed that the whipped cream started getting soft and didn’t look as cute. Solution- get more help with the decorating so that you can make them on the spot.
We used the “Minute to Win It” format for our “reindeer games”. We divided into four teams- team Rudolf, team Blitzen, team Dasher and team Donner and competed in 8 different challenges. We projected a countdown clock on the wall so that everyone could join in the drama as the seconds counted down. For more information on Minute the Win It games check out the following link.
http://familyreunionhelper.com/blog/2011/10/minute-to-win-it-party-2/
Many families gather together during the holiday season for their traditional Christmas parties. To get the party started , I like to have a simple craft or activity that can be done as everyone arrives and these log slice ornaments are just the thing. They’re a fun ice breaker that keeps your guests busy and requires little supervision and they’re pretty inexpensive.
With just a few supplies, you can whip up LOTS of them. Wood slice ornaments are perfect for hanging on your Christmas tree, attaching to gifts, or giving to friends and family. If you don’t have access to tree logs you can purchase pre sliced packages at the craft store. The ones I found cost under $2.00 for a package of 4, but the least expensive option is to cut your own.
After cutting your wood slices, don’t forget to drill a small hole at the top so that you can hang it on your tree or tie to a package.
Purchase chalkboard paint at your favorite craft store. Paint the center of the wood slice.
It doesn’t take long for the paint to dry but if you’re really pressed for time, have a hand held hair dryer to speed up the process. After the paint dries, draw a simple picture or write your favorite Christmas word with chalk. And don’t forget some cute Christmas string for hanging on the tree.
If you don’t want the mess of painting your ornaments and you have a die cutting machine, you can cut a variety of shapes and words and family members can apply those onto their wood slices. You could add a layer of decoupage on top so it will last longer.
I’ve been a Shrinky Dink fan for probably 30 years or better, way before they had the fancy kits they have now. When I first started making Shrinky DInks we called them Shrink Art and we used either plain sheets of plastic or clean or clear #6 plastic we got from the bakery.
In case you don’t know what I’m talking about, Shrink Art is made with thin plastic sheets that shrink down about 45% when you put them in the oven. Not only does the material shrink, but whatever artwork you draw/print on them will also shrink with it. So, you can draw and color a design in it’s large form where it is easy to see and work with and then shrink it down so it is more the size of a charm or an ornament.
I love to use shrink art for family reunions and parties. They make great dog tags, charms, pins and beads. Our Oz inspired family reunion includes a template to be used with Shrink Art. We had so much fun making the dog tags and our family loved wearing them during the reunion.
To make Shrink Art,preheat your oven to 325 degrees Fahrenheit
Trace your design on the plastic using a permanent marker such as a Sharpie marker. You can draw your own design or trace a clip art picture you found on the internet or use a coloring page.
Color your picture with permanent markers or colored pencils. If your plastic has a rough side, color on that side.
Cut out your picture and if you will be putting it on a string or chain punch a hole in it. You will not be able to make any holes or cuts once your picture has baked as it will be too thick.
Line a cookie sheet or tray with foil or baking paper. Arrange your pictures,color side up on the tray.
Bake in the oven for 3- 5 minutes. Keep your eye on them as they bake (that’s half the fun). At first your pictures will curl up but don’t panic, they will flatten out again. Once they flatten out bake for a few more seconds then remove from the oven. If they aren’t quite flat you can flatten them by pressing them a little more with a hot pad or wooden spoon.
When cooled remove them from the pan and you’re ready to use and enjoy your Shrink Art.
The Shrinky Dinks brand makes some fun pre-printed designs that you can purchase if you want to try out the process before striking out on your own. You can purchase the pre- printed Shrinky Dink designs or sheets of plain Shrinky Dink plastic by following the link below.