Best Salad Ever!

best salad ever

My sister-in-law, Pam, brings the most delicious salads to our family reunions and parties but this salad, with pecans and pomegranate seeds, is my very favorite.  If you’re looking for a yummy salad to share at your next family gathering consider taking “The Best Salad Ever”!

BEST SALAD EVER RECIPE

Salad

1 bunch of lettuce greens
Pomegranate seeds or Craisins
1 Granny Smith apple or pear, thinly sliced
1 c. Feta cheese
1 c. chopped sugared pecans
Combine mixed greens in a large salad bowl with pomegranate seeds, feta, pears and  pecan halves.

 Vinaigrette Dressing:

2 T. sugar
1 ⁄3 c. orange juice
1 T. Good Seasons Italian dressing (dry packet)
2 T. red wine vinegar
½ c. olive oil or Canola oil
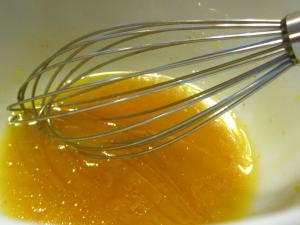
In a medium bowl, whisk vinegar with sugar, orange juice, dry salad dressing and vinegar. Whisk in olive oil or Canola oil gradually.  Store in refrigerator until ready to serve then pour over greens and enjoy.

Quench Thirsts At Your Next Reunion

quenching thirsts

Keeping your family hydrated during your family reunion is important and can be a challenge if you are having your reunion outdoors and if you will be encouraging playing sports and other physical activities. You can create a budget and fund for communal beverages, ask everyone to bring their own drinks or try one of ideas below.

Water Bottles For Family Reunions

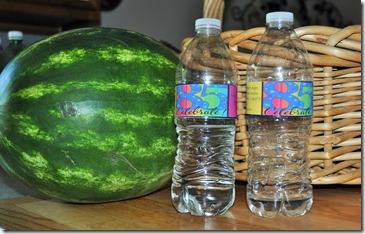
Water bottles give you a great opportunity to personalize your water bottles by making labels that support your reunion theme or your family name. Most of our family reunion theme packages include water bottle labels you can easily print and use on your water bottles.

image

A package of sticker paper can easily be printed on then cut and apply to the water bottles.  Get a good quality sticker paper, some of the budget paper aren’t as sticky and may pull away from the water bottle. Sticker paper is great if you won’t keep water bottles in ice but if the water bottles will be stored where they will get wet you should select a sticker paper that is water resistant.  You can find water bottle sticker paper in the familyreunionhelper store.

2015 06 07_1008

Water bottle labels compliment your reunion or party theme well and they can help save reunion funds and keep your reunion “green” if everyone writes their name on the bottle and reuses the same bottle during the reunion.

western water bottle label2_edited-2

circus waterbottle mom1_edited-1

Insulated cups from the Dollar Store

DSC_0167

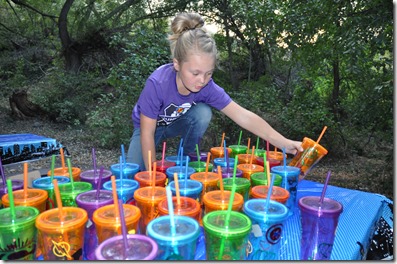
A fun idea our family discovered recently are insulated cups from the dollar store.  They cost a dollar (surprise) and come in a variety of colors.  If you need a lot of cups you will probably want to order them from the store’s online site.  They will ship for free to your local store where you can pick them up.  Although cups cost more than a water bottle they do make a great souvenir that your family can continue to use when the reunion is over. 

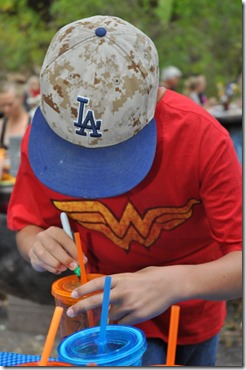
My daughter has a vinyl machine and she made a fun  logo that we put on all of our cups. They were a hit with the family and with so many cup colors family members were able to easily keep track of their own cups.

DSC_0186

DSC_0187

Water Coolers

water cooler

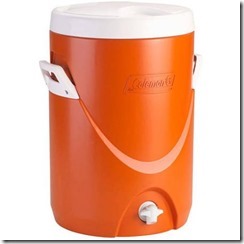
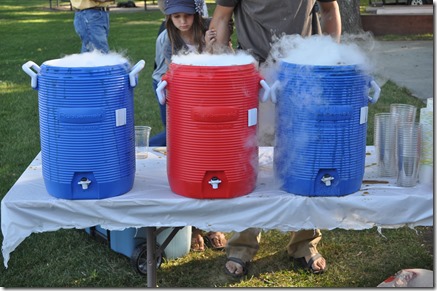
An  economical way to keep everyone hydrated is to use water coolers.  You can purchase a 5 gallon water cooler for around $25.00.  Buy several and keep one full of water and ice and one of punch or lemonade.  Drink coolers are also great for making homemade root beer. With coolers you can provide paper cups or can use them to refill water bottles or plastic drink  cups.

DSC_1040

Last but not least, ask everyone to provide their own beverages for the reunion. Asking everyone to provide their own drinks gives some relief to the budget and assures that everyone has their favorite beverage on hand.

Secrets for Hosting a Successful Family Reunion

3 keys to a successful reunion

3 Keys to a Successful Family Reunion

Planning a family reunion can be a nightmare. But the good news is that you are not alone, we can do this together. I don’t know your specific situation but I can tell you that if you will follow these 3 important keys you will be on your way to having a successful family reunion. So let’s get to work- first key is…

Choose a permanent reunion date

This is the most important aspect of reunion planning- it’s not much of a reunion if no one can attend.

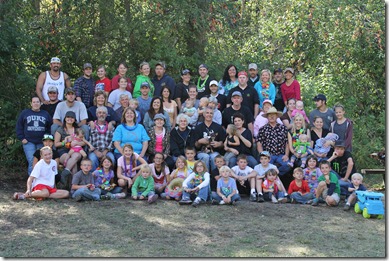
When we began planning the “Stewart” family reunion we were only working around about 20 people and it was fairly easy to find a date that was good for everyone, but now that we are more than 100 family members strong we would never be able to find a date that met everyone’s needs. Lucky for us, about 20 years ago we set Labor Day weekend as the permanent date for our family reunion.

We have found that holding the reunion at the same time every year helps family members plan their busy lives around that weekend. They always know when the Stewart reunion will be and although the location may change the date never does. Unbelievable but true- we usually have all but about 3 family members attend our reunion each year.

Plan a Reunion Date BEFORE You End Your Family Reunion

If you can’t choose a permanent date, plan your next reunion date before you end the reunion you are currently attending. Planning in advance will increase the odds that more people will be able to attend the reunion, which translates into more fun for everyone. If you book early, you can most likely get better rates and/or reserve your preferred hotel or retreat site, flights and other travel arrangements. Most campgrounds and parks can be booked a year in advance.

Last of all, stick to your decision. Changing dates in the middle of planning can create a huge amount of anxiety and additional work.

Key #2- Delegate Responsibilities!

People always wonder why we have such good attendance at our reunions and I tell them, “Because everyone has a job!” There is always someway that everyone can contribute to your reunion no matter what their age or their ability. You can assign a couple of pre-teen girls to do a story time or games for the younger children at your reunion, ask a 5 year old to bring a can of olives or assign someone that loves music to lead a sing- a- long.

It’s impossible to organize a reunion by yourself, I know, because I’ve tried it. Not only that, but it is good to have the input of different family members’ points of views. Family members that have a responsibility feel greater ownership in the reunion.

Make Assignments According to Abilities

Delegate tasks according to those with special talents, skills and connections. Our Uncle Ben owns a restaurant whose specialty is turkey steaks and quite often we have turkey steaks at our reunions or family parties. We have great Dutch oven cooks in our family and of course, we give them the opportunity to practice their skills. Use the resources that you have.

There are certain jobs at our reunions that have become tradition- for instance cousin R.D. and Uncle Richard always make the homemade root beer, Aunt Lynn is always in charge of Bunko and Uncle Steven always makes his Dutch oven potatoes.
brad's camp pictures 629

So how do you put all these people and their great ideas together? Let me tell you how we do it. There are six original children in the Stewart family; we call them the “Big 6”. We schedule a planning meeting and ask that there be a representative from each Big 6 family at the meeting. These people become your liaison from each branch of the family.

At the meeting we discuss our plans and make assignments, that way every family has a representative and if they have concerns they can be addressed at that meeting and each families’ fun ideas can be implemented. We ask for volunteers to be in charge of each major aspect of the reunion – food, family history, invitations, photography, games and activities, finances and facilities. The chairman of the committee, that’s me, takes the ideas and suggestions home and makes a master plan or schedule which is emailed to the committee members for their approval.

Reunion Committee

A reunion committee is essential to planning a smooth, successful family reunion. Be sure your chairman (if you’re reading this than the chairman is probably YOU) is creative, energetic and willing to put in the time and effort required to organize a reunion.

Planning a family reunion is a too big a job for one person, so make a checklist, get some help, put your entire family to work and let everyone share in the satisfaction of a job well done!

Choose a Theme For Your Family Reunion!

A theme gives your family get-together an added twist that can build excitement. Choosing a theme for a family reunion is a great way to interest people and make them more likely to attend your reunion. Who wouldn’t want to attend a “Caveman” reunion where they can feed on “Brontosaurus” Burgers?

caveman

Or Conjure up a Wild West atmosphere for your next family reunion or party by using the decorating ideas, wild and wooly western games, activities and recipes available at familyreunionhelper.com You’re sure to have a rootin’ tootin’ good time!

western

If your family has ever dreamed of sailing the seven seas in search of excitement and adventure plan a pirate reunion where you feast on barbequed parrots, search for treasure and walk the plank.

pirate

A theme also makes it more fun to plan when it comes to being imaginative with food, games, activities, invitations and just about every other aspect of the reunion.

If you have a wedding anniversary or a significant birthday coming up in your family you could choose to celebrate around those special events. If your grandparents were married in the 50?s, plan a fifties reunion complete with poodle skirts and sodas. If Aunt Addie will be turning 70, celebrate with her by having a seventies party- make tie-dyed shirts and decorate with peace and flower power signs.

When You Were My Age

Just because it is a family reunion doesn?t mean the theme has to be centered on the family itself. Plenty of other party themes are perfect for a reunion. Plan a western, caveman, boot camp or other similar theme.

A few years ago my sister-in-law suggested that we have a caveman reunion and I was pretty nervous about it- caveman? How do we do a caveman reunion? But we all shared ideas at our planning meeting and guess what- our caveman reunion turned out to be one of our best family reunions ever.

Whatever theme you choose, design your decorations, food, activities and games around that theme. Your caveman theme might feature Brontosaurus burgers and a dinosaur egg hunt or a pirate theme might include Barbecued Parrot and a treasure hunt.

Planning a family reunion requires serious effort and thoughtful strategic planning but if will follow these 3 important keys you will be well on your way to a memorable and successful family reunion. And who knows- maybe they?ll want you to be in charge next year too.

Aunt MO

Ghost Cake With Flaming Eyes

ghost cake

When I was a young mother I attended a workshop that included some fun holiday cooking ideas.  The most memorable idea I came away from the workshop with was this ghost cake with flaming eyes.

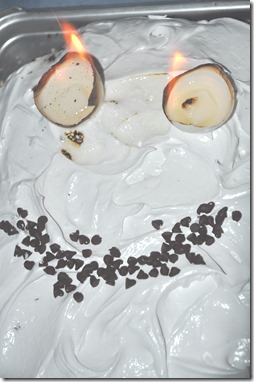
The best thing about this ghost cake is that you get maximum effect for minimum effort, so, if you are a busy mom or grandma, you can whip this cake up very quickly but the “wow” factor is huge!

To make the eyes flaming you place a lemon extract-doused sugar cube inside of a clean eggshell for each eye and then you light the cubes on fire. When presenting the cake turn out the lights before bringing in the cake.

DSC_1237

Ghost Cake Recipe

Ingredients:

1 (18.25-ounce) box yellow cake mix, mix according to package directions
1 (7.2-ounce) package fluffy white frosting mix or make your own 7 minute frosting. (No Cook 7 Minute Frosting Recipe)
2 sugar cubes & 1 teaspoon lemon extract
Licorice string, chocolate chips, m & m’s- whatever you want to make a mouth

Directions:

Heat oven to 350 degrees F. Grease and flour a 9 x 13 x 2-inch baking pan.

Prepare the cake mix as directed on package. (When you break the eggs, crack each in the middle and pour out the egg. Then save the 2 best shell halves. Wash these halves and turn upside down to dry.) After mixing, pour the batter into the pan.

Bake for 35 to 40 minutes. When cooled, you can remove the cake from  the pan and put on a sturdy piece of cardboard or a tray so that you can trim your cake to look more ghost- like.  I just left my cake in the baking pan and felt like it looked ghost- like enough without the extra work to decorate it.

Frost the cake. Place the 2 egg shell halves round sides down on cake for eyes. Place 1 sugar cube in each shell half. Make a mouth of licorice string.

Just before serving, pour 1/2 teaspoon lemon extract over each sugar cube. Light the eyes and amaze family and friends!

Eats Are On The Way

eats are on the way2_edited-1

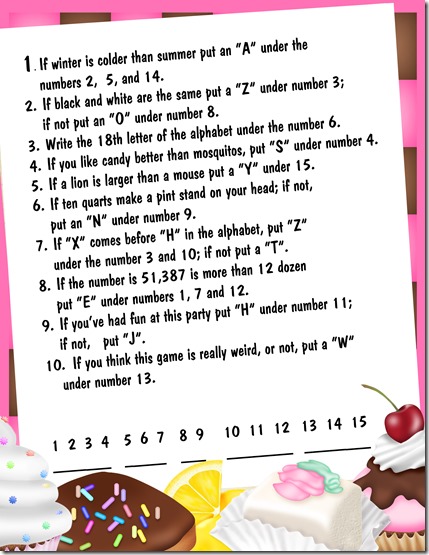
If you’ve hosted a party, shower or other gathering you know how difficult it can be to pull yourself away from the festivities in order to prepare the refreshments.  This simple game is the perfect solution! 

Just give your guests a copy of the game below and a pencil.  Tell them to solve the puzzle by answering the questions correctly.  As they get to work on the puzzle you sneak into the kitchen to prepare the refreshments.

The simple solution to the puzzle is, “eats are on the way”.  It doesn’t take much time to solve but it does distract for a few minutes and when they read the answer to the puzzle they’ll be content to wait until you return with the  “eats”.

eats

Cookies to Feed a Crowd

cookiesblog_edited-1

My husband has a favorite cookie recipe that he remembers from his youth.  These cookies are great for family reunions because they make about 120 large cookies and they keep really well- oh, and they have chocolate chips in them.

phone feb 2015 021

It’s been awhile since we made them and my husband got the urge to mix up a batch last week.  Unfortunately we couldn’t find the recipe.  I searched online thinking- no big deal you can find any recipe on the web- wrong.  This recipe is not there!  (Well, now it is.)  Eventually we found the recipe and my husband made this huge batch of delicious cookies.

I’m including the recipe in this blog just in case you want to whip a batch of cookies for your family reunion or gathering.  I’m not sure how many generations of Stewarts have made this cookies but there are some oddities with  the recipe that I will  try and clarify.  Actually, there are no instructions for mixing these cookies- I just use the traditional- cream sugar and shortening and eggs etc. method.  Here’s how we do it:

kw_ilovecookies_6 copy (2)

Sour Cream Cookies

Ingredients

1 pound brown sugar (1/2 of a 2 pound bag)
1 1/2 cups shortening
2 cups sour cream
4 eggs
2 tsp. vanilla
1 heaping tsp. soda
1 heaping tsp. baking powder  
6 cups flour
1 cup chopped nuts
1 large bag coconut
1 jumbo (2 regular bags) sized package chocolate chips

HEAT oven to 350°F.

BEAT shortening and sugar in large bowl with electric mixer until light and fluffy. Add sour cream, eggs and vanilla; beat until well blended. Add flour, baking powder, baking soda; mix well. Stir in chocolate chips, coconut and nuts.

DROP tablespoonfuls of dough into 1 cup granulated sugar and 1 tsp. cinnamon and roll until lightly coated.  Put dough, 2 inches apart, onto greased baking sheets.

BAKE 12 to 15 min.- do not over bake.

kw_ilovecookies_2 copy

Cooking With Pie Irons


pie iron blog 2015

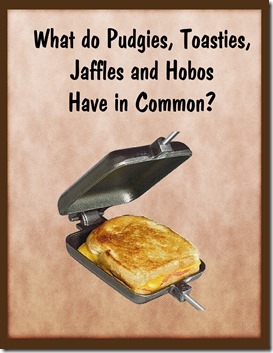
No, we’re not talking about the loved ones that will be attending your family reunion- we’re talking about Pie Irons! Pie Irons are known by many different names, Pudgie Pies, Pioneer Pies, Fire Pies, Toasties and Jaffles, but each name is referring to ingredient-filled "pockets" of bread toasted over a campfire. Cooking with pie irons is a long time tradition at our family reunions.

The Basics of  Cooking With Pie Irons

Camp cooking doesn’t have to be just hot dogs and roasted marshmallows. Our family reunions wouldn’t be complete without a delicious raspberry pie cooked over the campfire and sprinkled with sugar and cinnamon. With a pie iron, you can cook anything from a simple grilled-cheese and ham sandwich to a delicious berry pie for dessert.

pie iron2

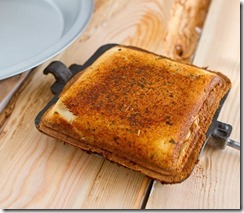
In its most basic function, a pie iron is a way to cook grilled cheese sandwiches and fruit pies over an open fire. This is done by placing the food inside the pie iron and then locking the two sides closed with a metal hook. Metal rods with wood handles extend from the castings so the user can easily maneuver the pie iron over a campfire. A few minute over the heat, usually 4 to 6 minutes, and you will have perfectly toasted sandwich or pie.

Pie Irons are available in both cast iron & aluminum. Our family prefers cast iron. They come in several different shapes; round, square, oblong and double. For our family reunions, we only use square irons. Aunt Lynn doesn’t think she’s had breakfast unless she has had a piece of toast so we’ve even used our pie irons for toast.

To make the most simple of pies, just take two slices of bread (buttered on the outsides), fill with jam, cheese, meat or pie filling- you don’t need much, then place inside the pie iron and lock it closed. Hold it over your campfire for a few minutes on each side and you’ll soon be eating a grilled cheese sandwich or a scrumptious apple pie.

At our family reunions, we like to make fruit pies in the evening while we are sitting around the campfire visiting, singing or playing games. About ten years ago, at a family reunion, cousin Mindy suggested that we sprinkle our freshly baked pies with sugar and cinnamon when we dump it out of the pie iron. Yummy! Some of our favorite flavors of fruit pies are lemon and raspberry.

Pie Iron Fruit Pies

clip_image002

Instructions

 Step 1

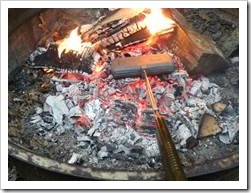
Build a campfire. Pie Iron pies do best over a hot bed of coals. Try to start your campfire an hour early to let it burn down.

 Step 2

Butter one side of each slice of bread. Place one slice, butter side down, in one half of the pie iron.

 Step 3

Put a spoonful of pie filling in the center of the bread slice. Keep the filling away from the edges, as it may leak while the pie is cooking.

 Step 4

Place the second slice of bread, buttered side up, on top of the pie filling.

 Step 5

Place the second half of the pie iron on the bottom half, squeezing the bread and filling together. Latch the two halves of the iron together, to keep it from opening up while the pie is cooking.

 Step 6

Place the pie iron over the campfire, and let it cook for several minutes (4-6 minutes). Turn the pie over, and check for doneness. The pie is done when both sides are golden brown and toasted.

 Step 7

Put the pie on a plate. If you have crispy edges you may want to carefully trim them. Be careful, as the filling is HOT! Sprinkle with sugar and cinnamon and enjoy!

The Family That Eats Together Stays Together


Or Forcing Your Family to Mingle

One difficult part of a family reunion or party can be getting your family to mingle during meal time.  We usually have each family group sitting together- the Maddox family, the Wynnes and the Stewarts all sitting in their own little group.  It’s not that we don’t like each other or don’t get along-we just gravitate to our  own family group.

Camp oz 345

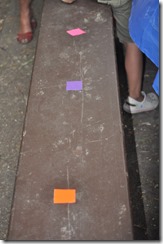
Here’s a fun way to mix things up.  Put a pieces of colored tape or ribbon on each chair or seating space (if you’re dealing with picnic benches)  When everyone has begun eating announce that everyone sitting on a yellow space must switch places with another yellow.  A few minutes later have pinks switch and so on.

DO NOT make it too complicated!  If you have green switch with pink and yellow with red, nothing will happen- everyone will remain in their original seat.  If you’re family is compliant and seems to enjoy the mixing up you could try switching two colors at a time but for the most part it’s best  to focus on one color at a time.  You don’t have to mix people up all in one meal- keep the colors on during your entire reunion and only do a couple of swaps per meal.

Towards the end of the meal you can announce “Rainbow Mixup” and everyone has to switch places.

HINT:  Choose a meal that doesn’t have a lot of plates and silverware etc. to be moved.

Crescent Roll Pizzas for Family Game Night


At our house, Friday night, is pizza and game night.  On Friday night, all the kids and grandkids that are available come to our house for homemade pizza and fun.  The truth be known I get a little tired of pizza every Friday so I’m always on the look out for non-traditional ways to prepare pizza and was excited about this super simple but yummy pizza variation.

image

You’ll only need four ingredients:

Pillsbury crescent rolls
Pizza sauce
Pepperoni or favorite pizza toppings
Cheese sticks

Preheat oven by the directions on the crescent’s

  • unroll the crescents
  • Add about 1/2 teaspoon of pizza sauce (more if you don’t mind the mess)
  • Place pepperoni or other topping on top of the sauce at the wide end of the crescent
  • Put your cheese on the wide end of the crescent
  • Roll beginning at the  wide end of the crescent
  • Bake for about 8-10 mins.
  • Let cool and enjoy!

Quick and Easy Dutch Oven Cookies

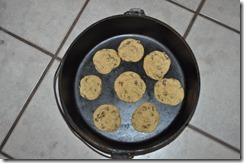
I usually mix up a batch of cookie dough to bake in our Dutch oven when we go camping, but on a whim I threw in a package of cookie mix for our last camping trip and it was a hit!

Case of Betty Crocker Oatmeal Chocolate Chip Cookie Mix (12 total)

Using the mix the cookies were quick and easy to stir together and I didn’t have to worry about keeping the dough cold.

DSC_0264

If using a 12″ Dutch oven, you can bake about 8 cookies at one time. Bake at 375 degrees for 10 minutes or until light brown. Use 6 coals on bottom, 22 on top.

DSC_0265

The mixes don’t make a huge batch and as good as fresh baked cookies taste when you’re camping you might want to toss in an extra package of mix.