Whether the Weather

weather blog


Predicting the weather for your next family reunion- yes, there is a tool to help!

KSTEW_RainRainGoAway-boy-cloud

A couple of months ago I was directed to a website that promised to provide free long range weather forecasts to help with planning outdoor activities.  I was excited to think there was a website like this, because, if you’ve ever been in charge of an outdoor family reunion or gathering of some sort, you know the most difficult thing  to predict is the WEATHER! 

Since my first visit to their website I have used their information at weathertab.com when  planning several family functions and each  time their predictions turned out to be accurate.  About a year  ago, I  used the weathertab website to get an  idea but how weather would be for our family reunion/vacation (12 months in the future) would be in sunny southern  California.  They predicted that the weather on the dates we would  be in California, it would rain for 3 days and they were right- it rained 3 of the days we were at Disneyland. (Which isn’t  necessarily a bad thing- no crowds and no waiting in line.)

The http://www.weathertab.com/ website doesn’t guarantee that their information is 100 percent accurate but their research and science does give you a bit of an advantage when trying to choose a date for your family reunion and they do say that their forecasts “start where others stop”.

The weathertab.com site can show you the predicted weather for 1 day to 18 months in advance, it is always free and requires no subscription or registration.

KSTEW_RainRainGoAway-boy-umbrella

I put the weathertab.com site to the test when planning my husband’s 60th birthday party.  I choose to have his celebration a day earlier because there was only a 13% chance of rain on that day instead of his actual birthday when there was a 39% chance of rain.

I felt lucky when we had a wonderfully sunny,  no rain, party on his special day.  I’m excited to use the site when planning next years family reunion. Check out http://www.weathertab.com/ when planning your reunion too and see if WeatherTAB’s  long range weather forecast can help you find a reunion day with a lower chance of rain too.

The cute graphics in  this blog have been  purchased from Kimberly Stewart, Scrapbook-elements.com

Superhero Reunion Theme

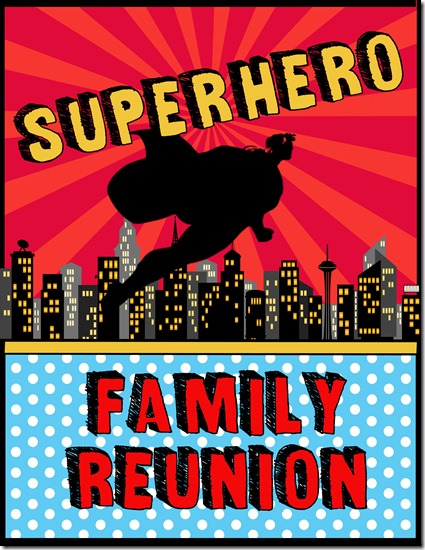
superhero cover_edited-1

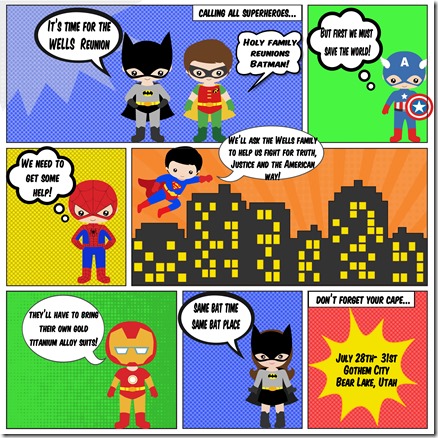
Family Reunion Helper proudly announces the completion of their latest family reunion  theme- Superhero!

Now you can bring all the action-packed adventure and excitement of your favorite superheroes to your family reunion!

Print

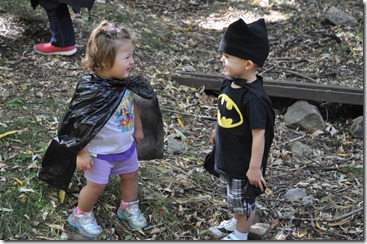
A superhero reunion will appeal to family members of all ages. Superheroes have unique skills, wear awesome costumes and save the world on a daily (sometimes hourly) basis.

A superhero family reunion lends itself to action-packed games, superhero training and fun activities.

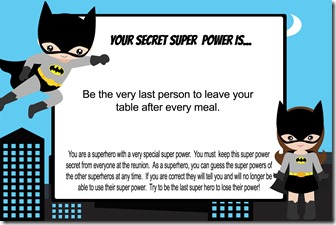
secret super power copy

This reunion theme package includes a fun printable reunion invitation, secret super power cards, water bottle labels, superhero training cards, “what’s my super power?” activity, Kapow!, Boom! and Zap! signs and fun printables for napkin rings and table decorations.

Our superhero reunion is jam packed with more than 35 pages of ideas for many of your favorite superheroes: Batman, Spider-man, Thor, Hulk, Captain America, Iron-man, Flash, Hawk-eye and even Aqua-man.

2015 09 27_4721

With the Superhero reunion theme your family will want to save helpless citizens, fight the forces of darkness and defeat the evil villains. Plan a superhero reunion and let your families’ powers shine. Whether they’re saving the planet or saving your family, a superhero family reunion or party will be a memorable reunion for anyone who has ever yearned to make right what’s wrong in the world.

ab

You can find the superhero reunion theme at Family Reunion Helper.com and by clicking on the link below.

Super Hero Family Reunion

Our Favorite Family Reunion Dinner-Dutch Oven Stacked Enchiladas

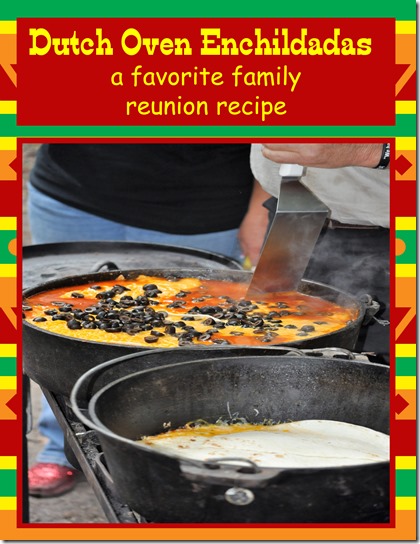
 dutch oven enchiladas

This is our favorite family reunion recipe- you make it one pot and it feeds 12- 14 depending on serving size.  We like to cook this in our Dutch ovens over a campfire but this recipe can easily be prepared and then baked in your oven.  Basically all you are doing is warming it up and melting the cheese.  We serve it with lettuce,  chopped tomatoes, sour cream salsa and tortilla.  Dutch oven stacked enchiladas is such a flexible recipe that you can substitute or add any ingredients that you desire.  You can easily make it spicy or keep it mild for the kids in  your family. It’s the perfect recipe for your family gathering. This recipe adapts easily to a 14 inch oven and even cake pan or casserole dish. 

DSC_0384Dutch Oven Enchiladas

2 lbs. hamburger
1 cup water
1 chopped onion
1/2 cup grated cheddar cheese
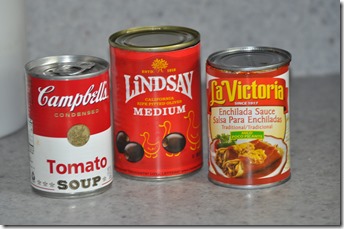
1 10-ounce can enchilada sauce
1 10-ounce can tomato soup
2 cups of salsa (mild or hot)
1 can olives, sliced
2 lb package shredded cheese
Flour tortillas (9-inch size)
Optional: for extra spice add 2- small cans diced chilies and one package taco mix

    DSC_0391

Heat 12 inch Dutch Oven over coals.
Brown hamburger, onion and salt
Drain drippings.
Add soup, water, enchilada sauce and salsa.
Simmer 10 minutes.
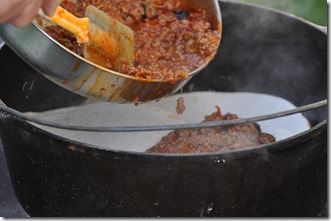
Put ¾ of hamburger and sauce mixture into separate container.
Arrange 3 tortillas over mixture remaining in oven.
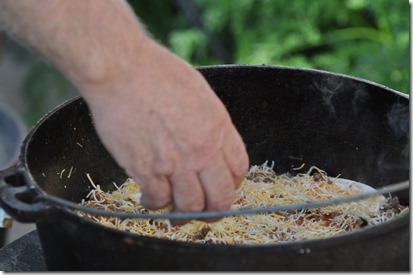
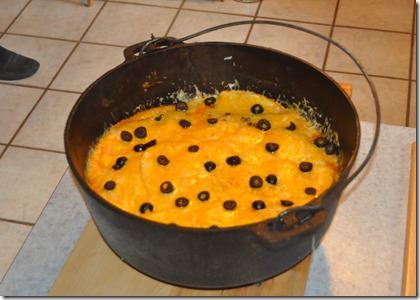
Alternate meat, cheese and tortillas in three layers ending with cheese and olives.

DSC_0393

Bake with 12 coals underneath and 16 on top until heated through about 45 minutes or in your oven at 350 degrees for 45 minutes to an  hour.

Hint: Serve these enchiladas to your guests to be sure you get to the  bottom of your stack. You don’t want them to scrape off the top of enchilada stack.
Serves: 12- 14

DSC_0403

Have a Trail Mix Buffet

trail mix buffet

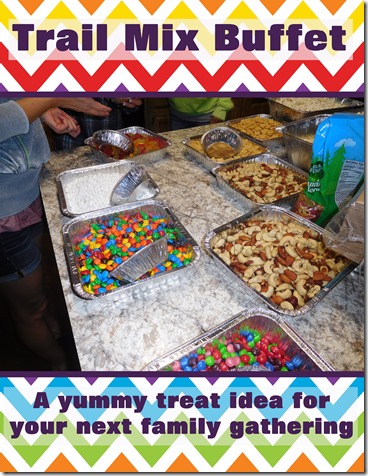
A trail mix buffet is a fun option for your western or rustic themed reunion or party.  If your occasion is more formal you can dress up your buffet with glass apothecary jars for a fancier look which lends itself to fancier parties such as wedding receptions or anniversary celebrations. A trail mix buffet is also a fun treat idea for a movie themed or kid themed party.

For our family reunion of 100 guests we used large tin foil pans to put the many treat options in but using  a variety of glass jars, tin buckets, and baskets are great for holding all the delicious goodies  your guests can choose from. .

Image result for build your own trail mix bar

Serving guests is a breeze and everyone fills their own containers (paper sacks, sandwich bags, party treat bags,  boxes or paper ice cream cups) with their favorite treats.

You can use healthy ingredients for your buffet featuring raisins, nuts and seeds or a kids favorite buffet using cereals, M & M’s and gummy bears.  Use your imagination when selecting treats for your buffet.

Image result for trail mix buffet+

Here’s a list of possible options for your buffet:
nuts- almonds, peanuts, pecans, cashews etc.
pumpkin seeds, sunflower seeds
cereal such as Cheerios, Trix, Chex, Fruit Loops or Captain Crunch etc.
chocolate chips, butterscotch chips, vanilla or peanut butter chips etc.
candy-  M&M’s, candy corn, gummy worms, milk duds, sour patch kids etc.
granola
marshmallows
coconut, banana chips
pretzels, goldfish crackers
raisins, Craisins, chopped dates, yogurt raisins
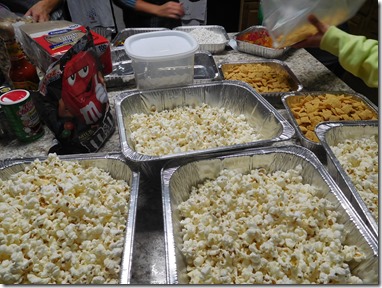
Popcorn makes a great filler.

DSCN2942

Make signs for ingredients your guests may not recognize. Custom labels, mini chalkboards and cardboard tents designed to  support your theme will do the job. Print off the following food tents for your trail mix buffet. western food tent

Untitled-2

Provide serving scoops such as ice cream scoops, oversized spoons or measuring cups- you’ll need one for each treat in your buffet.  Smallish scoops help control serving size to assure that there is enough if each treat for all your guests.

Nail It Game!

nail it

I love finding a new game to share with my family and friends and the game I’m sharing today is a good one. Simple to put together and simple to play. This version of the “stump game” can be played by everyone and we call it “Nail It”.

DSCN2153

Nail It Game Tools

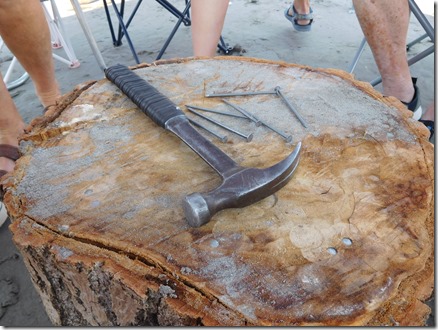
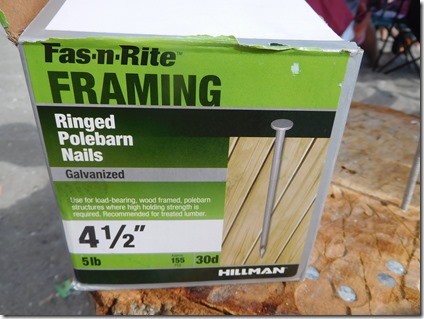
To play you need a tree stump, as many nails as there are players, and one hammer.   The nails we used are pictured below.

DSCN2283

How to Play the Nail It Game

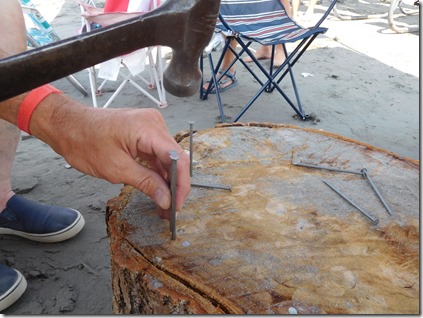
Everyone puts their nail into the stump just enough for it to stand nice and sturdy (in the order that you are standing in the circle). Each player then “claims” a nail by placing his or her finger on the nail to claim it as theirs. This will be his nail for the duration of the game. It is generally understood that people will claim the nail directly in front of them.

DSCN2154

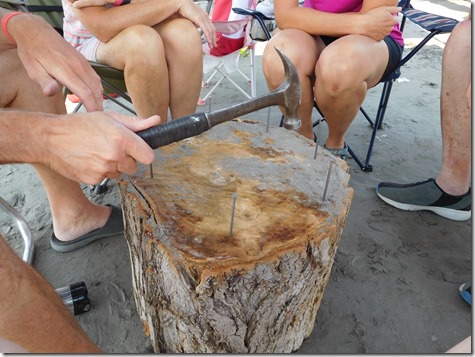
The first player taps the hammer two times on the stump and then takes a swing at any of the nails but their own.  They either hit the nail or miss the nail- either way the hammer is then passed to the next person in the circle and they repeat.

Winning the Game

The goal is to hit everyone else’s nail until it is flush with the stump and to be the last nail standing.  A player is eliminated from the game (and thereby takes no more turns) once any part of the head of his nail passes below the level of the surface of the stump (including bending over the edge of the stump without actually entering it). Use your fingernail to test if the nail is flush.

DSCN2149

It is common for the winner of the game, should he choose to do so, to drive his own nail fully into the stump in a victory drive.

I have to say I was a surprised when, doing research for this blog, found that the “stump” game is actually a drinking game.  So, as a disclaimer, let me say that we have played this game and never, at any time, have we had to have a can of beer in our hand to have fun playing it.  It’s a great game for family members of most ages and abilities.  Sometimes the most powerful hammer swingers are the worst players. 

Nail It Game Tips: 

*You may all stand or all sit to play
*Keep your face a safe distance from the stump so you don’t get hit in the head.
*Be careful reaching across the stump to hit a nail- you may hit your palm on a nail and it doesn’t feel very good.
*Choose good, sturdy nails- too small and some players can drive them in one swing.

Cat Eye Flashlight Hike

cat eye hike_edited-1

Cat-eye Hike for Family Reunions or Parties

One of the most requested activities at our  family reunions is a Cat Eye hike.  You do a Cat Eye hike in the dark so it’s a  perfect activity for a “camping” family reunion. We have also done cat eye hikes in apartment complexes and residential areas.  We’ve done cat eye hikes with family reunions, girls camps and for kid parties.  It’s a fun activity but does take some time and thoughtful strategy to set up.

clip_image002

How to Organize a Cat Eye Hike

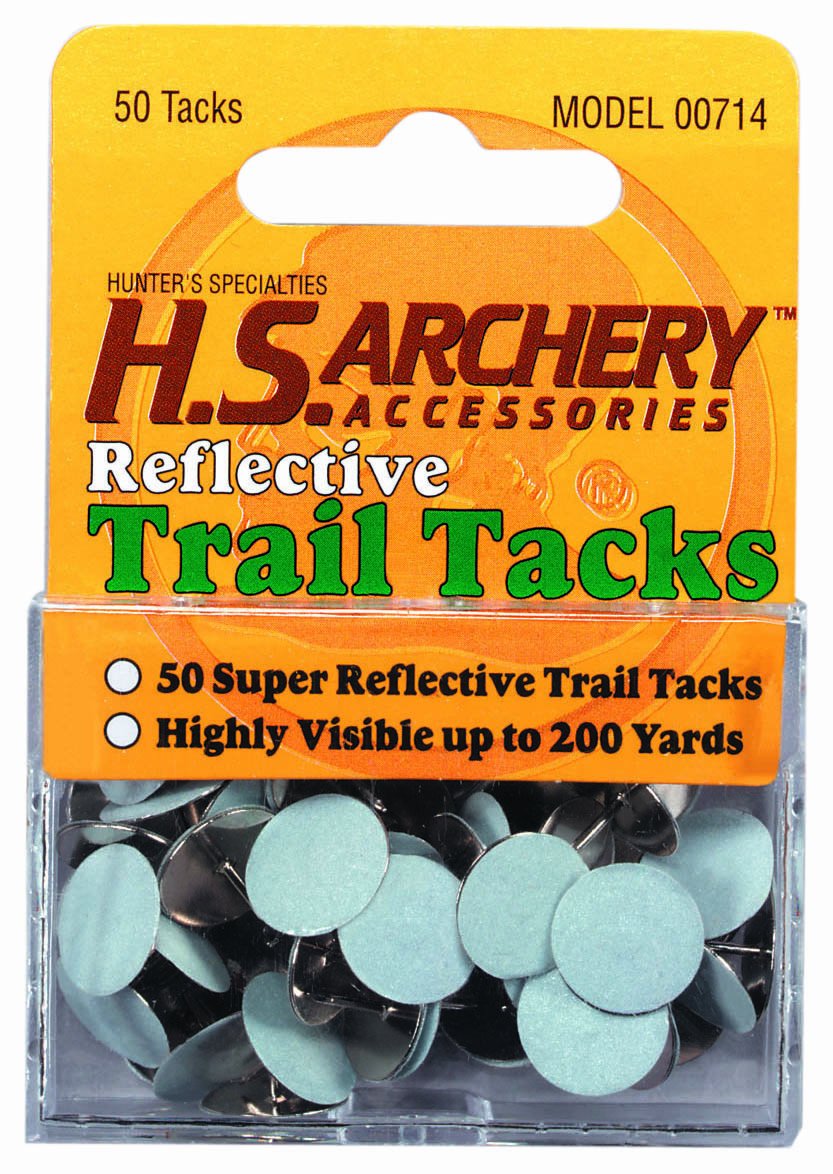
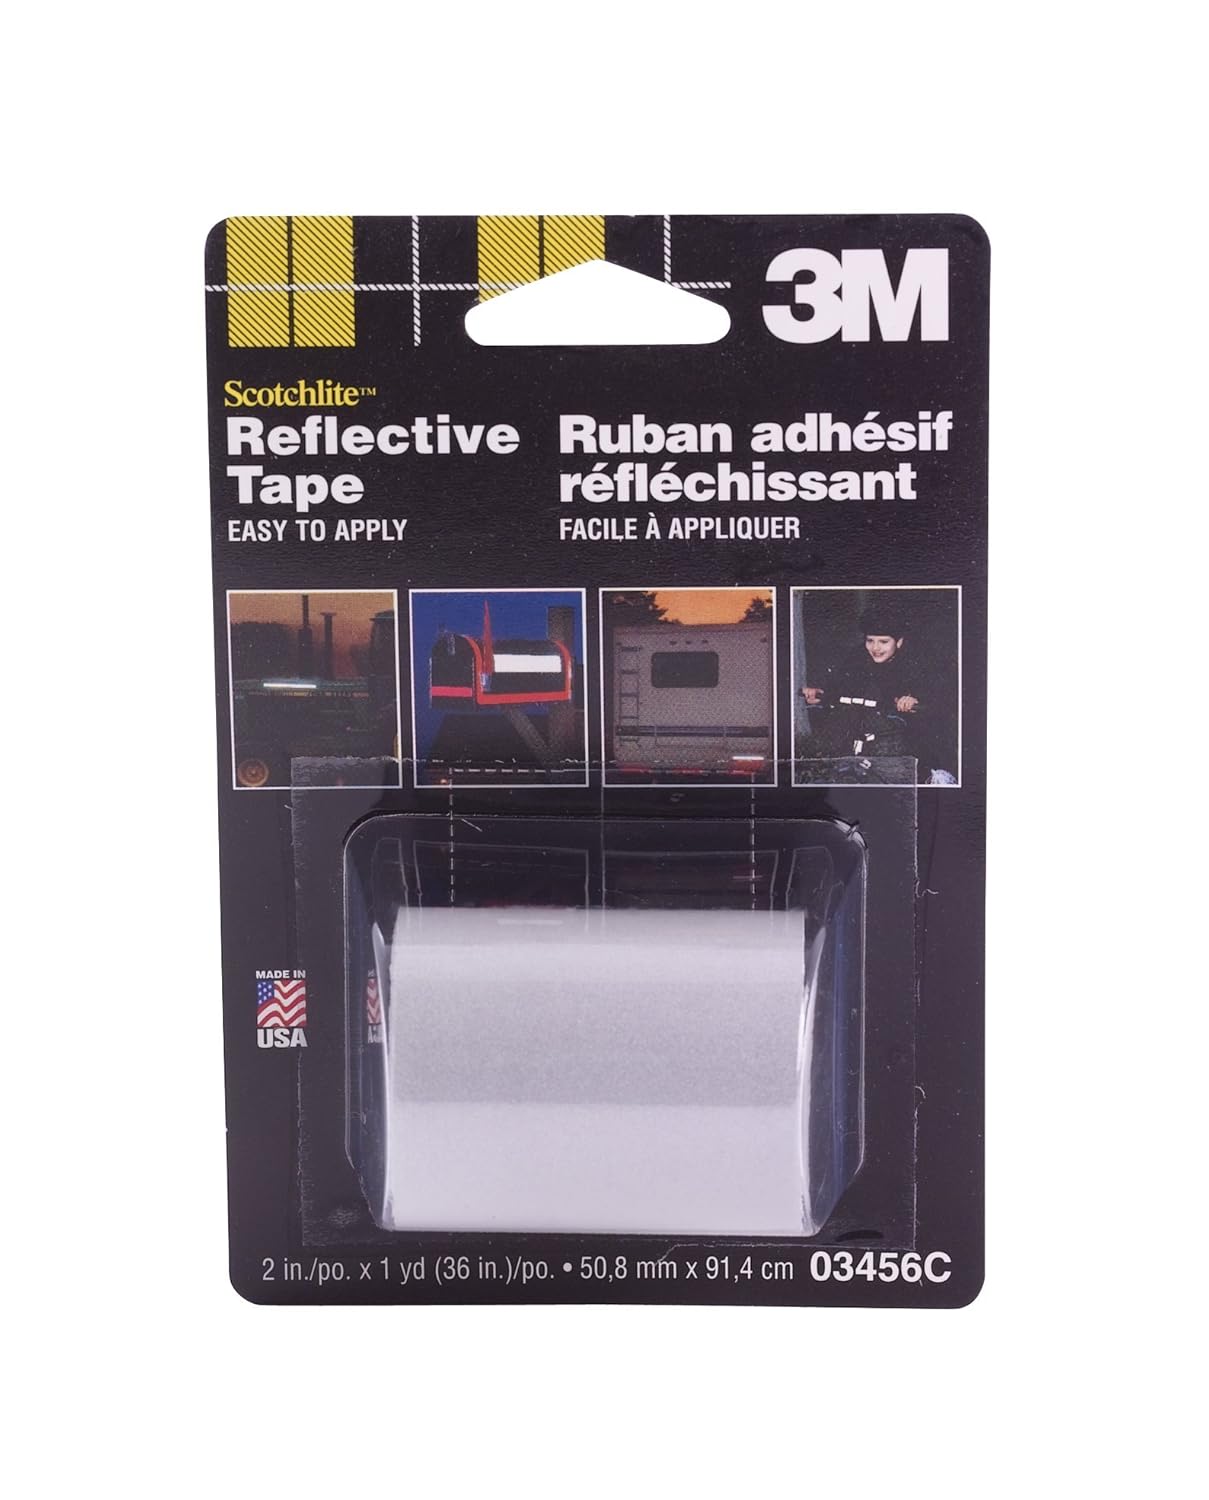
This hike is best done when it is very dark. Cut cat’s-eye shapes (squares work fine too) from reflective tape, available in the Family Reunion Helper store. Another product you might want to consider is “Trail Tacks”.  They are basically just thumb tacks with a reflective paint on the top.  They are visible for up to 200 yards and are great  for sticking into wooden fences etc. You will probably want to use a combination of the two products- tape and tacks.  Just be considerate of others when you set up the hike- you don’t want to be shinning flashlights into peoples windows or causing  damage with reflective tape or tacks.


It is best to set up your hike the night before guiding groups on the hike. Put cat eyes on markers or apply cat eyes to index cards and then use the cards to mark the trail. We like to set up our hikes the night before the cat eye hike is scheduled.

How to Set Up a Cat Eye Hike

When making the trail, place the eyes in such a manner that you can see only one more set of cat’s eyes from the location of one set. Hikers will shine their flashlights on the first set of eyes and then run to the second set of eyes where they will shine their flashlights around the area until they locate the next set of eyes. They will continue searching for eyes and following their path until they arrive back at camp.

If you have a large group, instead of a mass start, send groups of ten or so at a time. You can group hikers as children, teenagers and senior citizens.  Every participant will need a flashlight- you will want to remind your family members to bring a flashlight on your reunion invitation.

If camping, have S’mores for hikers when they complete the hike.

Cooking With Pie Irons


pie iron blog 2015

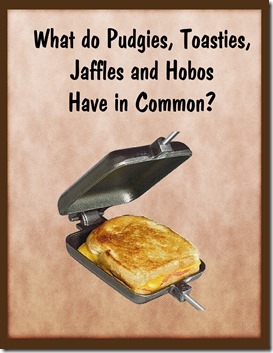
No, we’re not talking about the loved ones that will be attending your family reunion- we’re talking about Pie Irons! Pie Irons are known by many different names, Pudgie Pies, Pioneer Pies, Fire Pies, Toasties and Jaffles, but each name is referring to ingredient-filled "pockets" of bread toasted over a campfire. Cooking with pie irons is a long time tradition at our family reunions.

The Basics of  Cooking With Pie Irons

Camp cooking doesn’t have to be just hot dogs and roasted marshmallows. Our family reunions wouldn’t be complete without a delicious raspberry pie cooked over the campfire and sprinkled with sugar and cinnamon. With a pie iron, you can cook anything from a simple grilled-cheese and ham sandwich to a delicious berry pie for dessert.

pie iron2

In its most basic function, a pie iron is a way to cook grilled cheese sandwiches and fruit pies over an open fire. This is done by placing the food inside the pie iron and then locking the two sides closed with a metal hook. Metal rods with wood handles extend from the castings so the user can easily maneuver the pie iron over a campfire. A few minute over the heat, usually 4 to 6 minutes, and you will have perfectly toasted sandwich or pie.

Pie Irons are available in both cast iron & aluminum. Our family prefers cast iron. They come in several different shapes; round, square, oblong and double. For our family reunions, we only use square irons. Aunt Lynn doesn’t think she’s had breakfast unless she has had a piece of toast so we’ve even used our pie irons for toast.

To make the most simple of pies, just take two slices of bread (buttered on the outsides), fill with jam, cheese, meat or pie filling- you don’t need much, then place inside the pie iron and lock it closed. Hold it over your campfire for a few minutes on each side and you’ll soon be eating a grilled cheese sandwich or a scrumptious apple pie.

At our family reunions, we like to make fruit pies in the evening while we are sitting around the campfire visiting, singing or playing games. About ten years ago, at a family reunion, cousin Mindy suggested that we sprinkle our freshly baked pies with sugar and cinnamon when we dump it out of the pie iron. Yummy! Some of our favorite flavors of fruit pies are lemon and raspberry.

Pie Iron Fruit Pies

clip_image002

Instructions

 Step 1

Build a campfire. Pie Iron pies do best over a hot bed of coals. Try to start your campfire an hour early to let it burn down.

 Step 2

Butter one side of each slice of bread. Place one slice, butter side down, in one half of the pie iron.

 Step 3

Put a spoonful of pie filling in the center of the bread slice. Keep the filling away from the edges, as it may leak while the pie is cooking.

 Step 4

Place the second slice of bread, buttered side up, on top of the pie filling.

 Step 5

Place the second half of the pie iron on the bottom half, squeezing the bread and filling together. Latch the two halves of the iron together, to keep it from opening up while the pie is cooking.

 Step 6

Place the pie iron over the campfire, and let it cook for several minutes (4-6 minutes). Turn the pie over, and check for doneness. The pie is done when both sides are golden brown and toasted.

 Step 7

Put the pie on a plate. If you have crispy edges you may want to carefully trim them. Be careful, as the filling is HOT! Sprinkle with sugar and cinnamon and enjoy!

Five Things I Will Never Do Again at a Family Reunion

5 things i  will never do at a family reunion

1.  I will never make a fish print t shirt. 

fish t shirt1

Fish  print t shirts- it seemed like a great idea- and it fit our theme perfectly but in the end it was an epic fail.   To make the shirts you generously paint one side of the  fish with fabric paint. Then you place the T-shirt front side down on the painted fish and pat in place.

When you lift the t shirt  off the fish you have the imprint of the fish, scales and all, on the shirt. 

I’ve seen cute shirts done this way but the only fish we could  find were HUGE catfish- in most cases bigger than the shirt.  Everyone worked hard to make the shirts successful but when only half of the fish fits on your shirt it’s kind of disappointing. This activity goes down as the worst one I’ve ever planned.

Never again will  I plan an activity or craft without trying it out on my immediate family before using it at a family reunion.

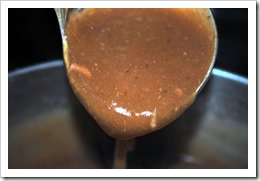
2. I will never let a scientist be in charge  of making gravy

gravy

At a huge family dinner I was in charge of I gave the  responsibility for making the gravy to a scientist who had all the correct formulas for making gravy but couldn’t seem to get it to thicken up.  It looked like brown water.  I had 300 people sitting at tables waiting to be served and no gravy for their potatoes.  Panic mode! 

I finally enlisted the help of a school lunch cook who swooped in  and easily thickened the gravy.  It was kind of a touchy situation- I didn’t want to offend the  scientist but I really needed to get that gravy thickened so I had to turn to the REAL expert.

This “never” item  isn’t about gravy it’s more about assigning people responsibilities that they can be successful  at completing.  I learned to make sure I matched the right people with the right assignment!

3. I  will never hold a reunion without having a plan for bad weather.

camp 201

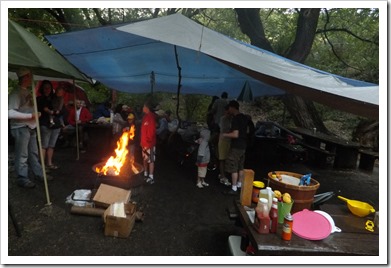
Look at this picture- these are not happy times. A rainy family reunion  is not a happy family reunion. 

We’ve been  holding the Stewart family reunion for 30 years and have only had bad weather two times.  So what am  I complaining about- that’s a pretty good record.  It’s great, unless it’s one of the times it rained for three days. 

Rain and other bad weather can really put a damper on your  family reunion.  Our family were really great sports when it came to this family reunion in 2012 but a break from the rain would’ve been nice.  Now when  I  schedule our reunion I also reserve a nearby church’s cultural hall where we can do activities, eat a meal and get out of the weather for awhile if needed.  We also come prepared with large tarps and portable heaters- just in case. 

Of course, if you hold your reunion at a hotel this won’t be as much of an issue- unless, you plan on attending a theme park or other outdoor activities.  Talk to hotel officials in advance about the use of large conference halls for a bad weather day.

4. I  will never reserve a reunion site without shade.

Chrtistmas

Several years ago, we had a difficult time finding a location for our family reunion.  Someone beat us to the punch and we  lost out on our normal reunion site.  (That hasn’t happened since.) In desperation we reserved a campsite at a hot springs thinking that swimming would be great fun  for everyone- it was.  However; there was no shade whatsoever and it was HOT!  We put up some tarps to give us some relief but the sun beat down on us relentlessly.  Everyone was exhausted from swimming in the hot springs pools and then baking in the hot sun. 

Since that reunion I have made it a policy to check out our family reunion sites personally.  A couple of things I look for in a suitable site are:  proximity  to the bathrooms
        suitable sites for tents  and trailers
        Enough parking (most campsites restrict the number of cars) 
        cooking facilities & eating arrangements
        open space for games and activities
        and SHADE!

5.  I will never contribute to a boring reunion.

4th of july 2014 016

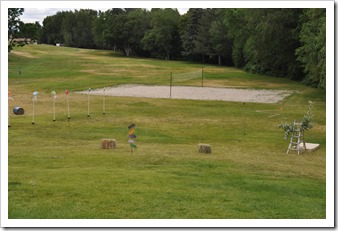
This is a picture of the really awesome obstacle course we put together for a family reunion.  Where’s Waldo?  You won’t  find Waldo or any other human in this picture because nobody wanted to do anything- BORING!

I was asked to plan activities for a large family.  My family worked hard at hauling bales of hay, ladders and other props for a dynamite obstacle  course.  We  also organized Frisbee golf and volleyball tournaments- BUT… nobody wanted to participate.  Their reunion consisted of eating, visiting (which  is important) and holding  an auction.  The most frustrating part of the reunion for me was when we finally got enough people together to play volleyball and the reunion  organizers shut us down so they could start the auction.  UGH!

When  I attend a family reunion I want to get to  know family members better- I want to  play with  them, laugh with  them and get a little crazy with them, but if that’s not what’s  important at your reunion  don’t ask  someone  to plan activities. 

I learned from this experience that I had better know who my “audience” is and plan activities (or no activities) depending on their  family makeup and interests.

Getting It Right– Choosing A Family Reunion Location

This is a freelance article authored by Sally Fain

family reunion location blog

Getting It Right – Picking A Family Reunion Location

A family reunion can be great fun, but it can also be fraught with difficulties. Every family is different, and therefore likely to react differently to different situations. While some family reunions may work best if the family remains closely grouped and in proximity to one another at all times, other families may understandably feel that being around one another 24/7 is a high-speed route to irrevocable family breakdown! Choosing the right location for your reunion is therefore crucial to ensure that everything goes according to plan. Luckily, there’s an ideal place out there for everyone!

Reunion Locations- Consider The Kids

hotel

One major factor to take into consideration is how many children will be attending your reunion. If it’s not very many, or those that are attending are older teens, then finding somewhere with child-friendly activities is not so much of an issue. However, if a lot of attendees have young kids, then it is crucial to make sure that you book a place which will give the kids plenty to do.

While chatting, reminiscing, and catching up over a few beverages can keep adults occupied for hours, the same is not necessarily true of children. While many kids will, to a certain extent, play together and keep each other entertained, relying solely on the capacity of your children and the children of your relatives to play nicely together can be a recipe for disaster.

You don’t want to spend the whole of your reunion breaking up fights over toys etc, and dealing with bored, grizzly kids. You also would like your offspring to enjoy the reunion as much as you will. As such, it’s probably a good idea to plan ahead and book a place which gives the kids plenty of scope to run around, enjoy themselves, and be nicely tired out by the time the grown-ups retire to the bar for that all-important gossip. Many theme parks like Walt Disney World family reunion packages which are sure to delight both adults and children. If this is perhaps a little too child-centric, try picking a venue with a play-park, a crèche, or a toy-room attached.

Relaxation

cruise ship

Ideally, many people want to combine their family reunion with a vacation. Meeting up with the relatives can be stressful, so many people try and choose a relaxing location in order to ease the pressure a bit. There are plenty of spas and country retreat which offer a relaxing family reunion package, but smaller families could do a lot worse than to book themselves onto a cruise. While some may quail at the thought of being stuck on a boat with their extended family for days, others will be surprised at just how much scope for family fun and gentle, solo relaxation is provided by cruise lines these days. Even the kids will be happy, as plenty of cruise lines offer a considerable amount of child-centric activity. Most cruises make plenty of shore stops in diverse locations, meaning that you can cement your family bonds by experiencing new places and cultures together, or escape from them all in a foreign port for a couple of hours – whatever floats your boat (excuse the pun).

Accommodation Without Compromise

suitcase 2

Most families, of course, do not fall neatly into any particular category. They are made up of diverse elements, all of which want different things out of a family reunion. Ideally, therefore, a family reunion venue should provide the opportunity both for teenagers (for example) to be alone with their phones, and for grandparents to spend a reasonable degree of time with their grandchildren without compromising either party too much. Parents will probably need a certain amount of space in which to corral their children and recover from familial overload, while at the same time having lots of facetime with relatives they’ve not seen for years.

A cabin vacation can accommodate a variety of such needs, without too much compromise. Retiring to individual cabins (or the beautiful countryside in which many such cabin facilities reside) gives those who need it some alone time, while those who wish to can gather and chat in one of the other cabins. Family can gather together at mealtimes, thus ensuring that time for connection and catch-up is given to everyone. A cabin vacation (or similar) gives individuals a degree of independence while ensuring that family connection still remains at the forefront of the reunion. Perfect for large groups with diverse needs!

5 Gallon Bucket Seats For Your Camping Reunion

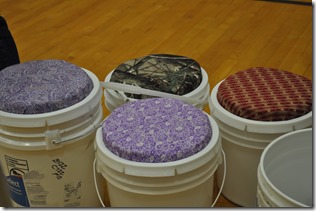
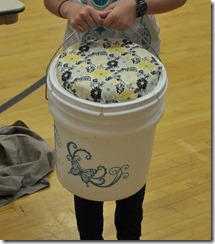
Making and decorating their own 5 gallon bucket seat is a great ice breaker activity for your family reunion.

4th of july 2014 042

5 Gallon Bucket Seats for Your Family Reunion

If your family reunion is held at a campground you might find these 5 gallon bucket seats a fun and useful addition to your reunion. They’re easy to make and handy for storing anything you might want to access quickly such as flashlights, sunscreen, bug  spray, gloves etc.

What you’ll need:

4th of july 2014 028

5 gallon bucket (Have everyone bring their own bucket.  If you have family that will be traveling long distances to attend your reunion, purchase their buckets for them.)

Fabric-I like using bandanas

Polyethylene foam or quilt batting for the cushy part of your seat.

Particle board or for a more economic solution use cardboard.

Scissors

Sharpies

Staple guns

NOTE: Be sure and have plenty of scissors and staple guns so that people are not standing around waiting to use them.

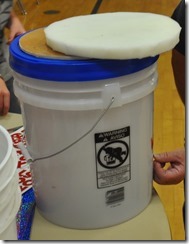
Step 1. Cut the circles out of particle board or plywood scraps

Trace the lid for your pattern then use a jigsaw to cut circles from particle board or any scrap wood you may have.  You will want to have these cut in advance if you are camping.  Of course,if you are using cardboard they can be cut at the campsite.

Step 2:  Add The Padding.

For the first buckets we made we used very thick (2- 3 inch) foam but we found that any padding at all makes the bucket more comfortable- even a couple of layers of quilt batting works well.  Our best buckets were made with  1/2 inch Polyethylene Foam.

Place the wood circles on the foam and trace them. Cut the foam to fit.

NOTE: Be sure the handle of your bucket can move up and down. If your foam is too thick the handle won’t be able to move.

Step 3: Attach the fabric

4th of july 2014 031

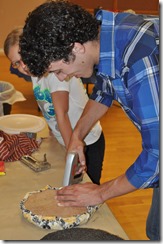
Lay the wood piece on top of your fabric and add three inches to the circle. Cut out the fabric and then  using staple guns attach the batting and  fabric to the wood circle. Pull the fabric tight before stapling it on the board.

Step 4: Decorating Your 5 Gallon Bucket

4th of july 2014 036

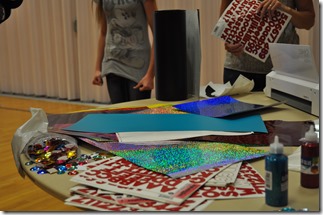
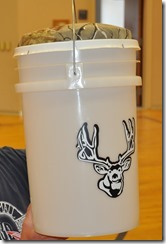
Here’s the fun part!  If someone in your family has a vinyl cutting machine such as a silhouette, ask them to cut a variety of shapes and designs that can be used to personalize buckets.  Supply alphabet stickers, glitter glue, sticky jewels, buttons, ribbon  and permanent markers so family members can decorate their buckets in their own personal style.

4th of july 2014 035

4th of july 2014 038